
Wachat Bot allows simple integration between chatbots and WhatsApp, allowing businesses to reach their customers in an environment they already know and love. In this blog post, we’ll guide you through the simple steps of connecting your chatbot to WhatsApp using Wachat Bot.
Step 1: Navigate to the Connections Page
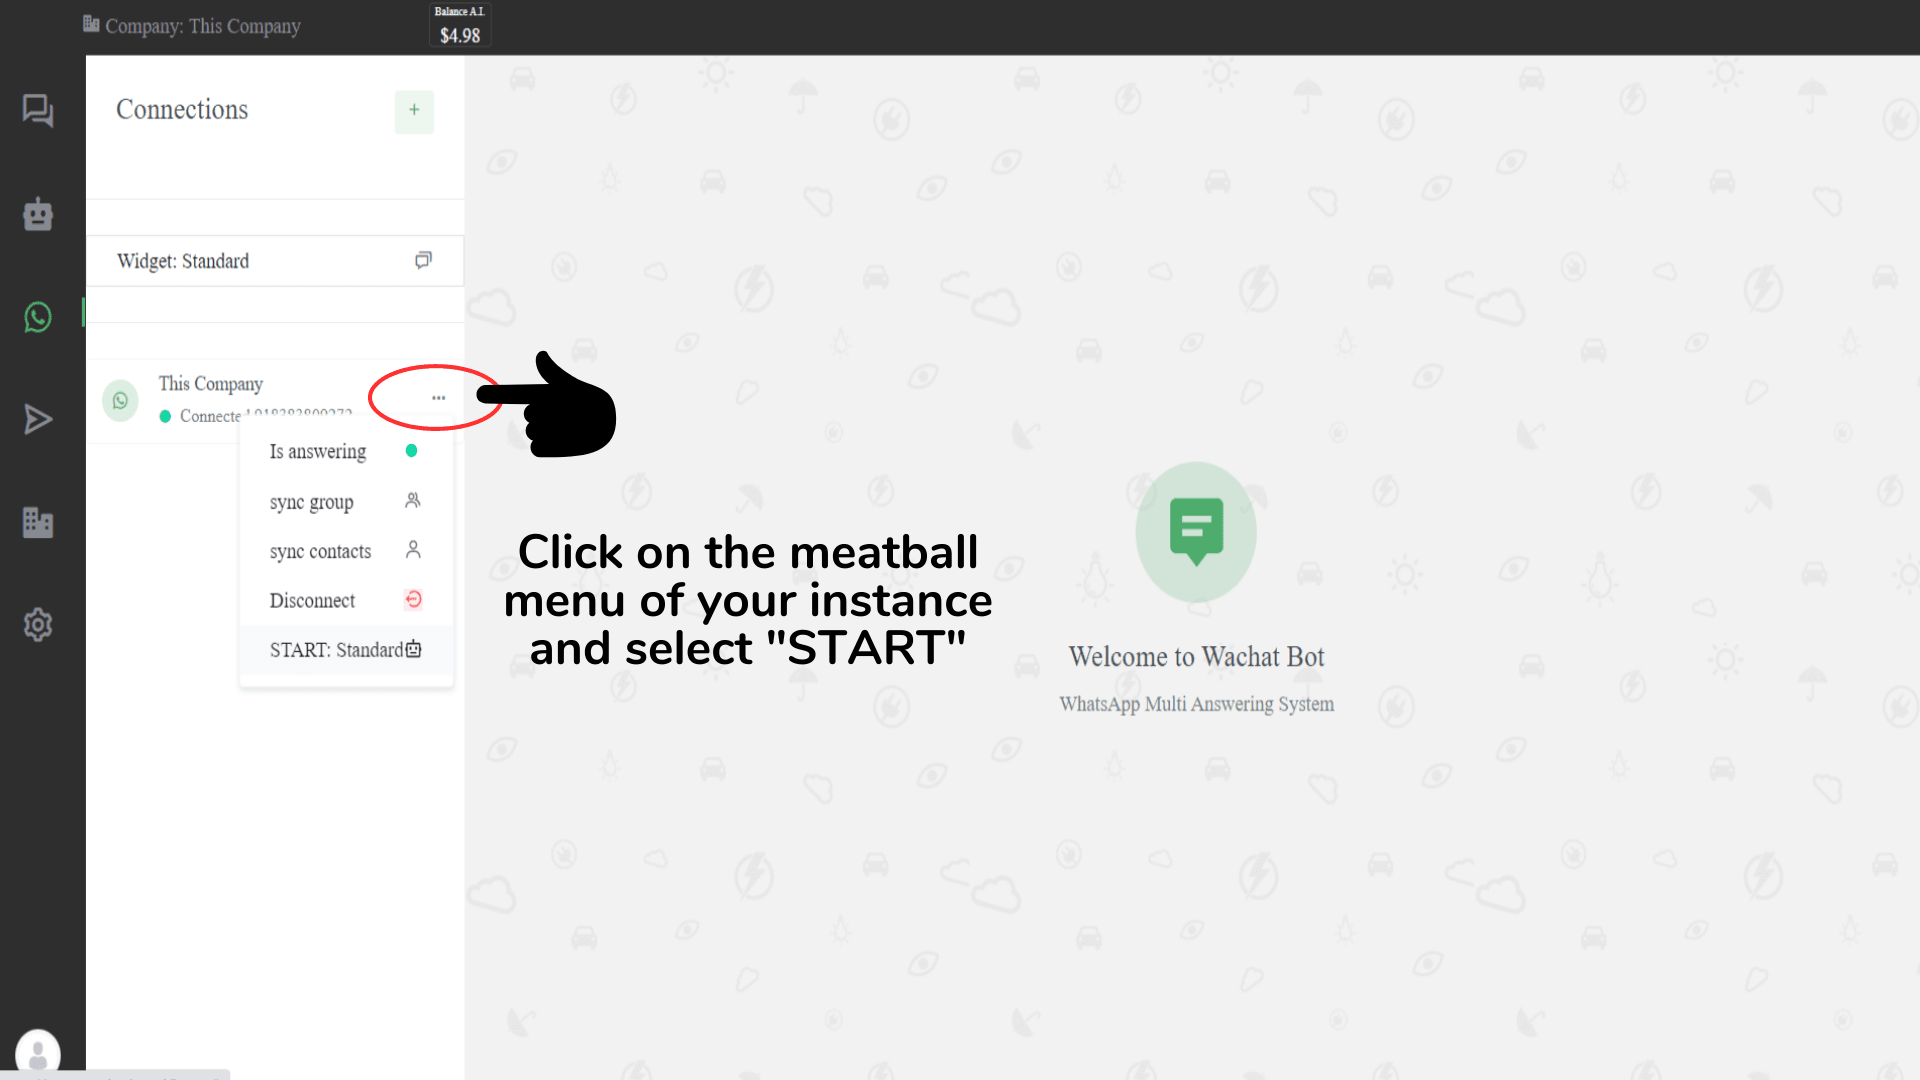
Start by heading to the Connections page. Here, you’ll see a list of instances, with the word “Connected” below those that are already connected to WhatsApp.

To start connecting a new bot, find the meatball menu (three vertically aligned dots) next to one of these instances. Clicking on this menu will open a list of options. From here, select the “START” option.
Step 2: Select Your Bot and Save
Once you’ve clicked on “START”, a pop-up window will appear. This window provides a drop-down menu that lists all your bots. From this list, select the bot you wish to connect with the WhatsApp instance.

After selecting your bot, click on the “Save” button to confirm. This action links your selected bot to the WhatsApp connection you started in the previous step.
What’s Next?
Now that you have successfully connected your bot to WhatsApp, it’s time to make your bot accessible to your customers and prospects. The next step involves creating contacts within the Wachat Bot system.
Creating contacts involves adding contacts individually or importing multiple contacts from a CSV file. Remember, each contact you add becomes a potential conversation for your bot, helping your business reach out and engage with customers or prospects.
To create an account, go to: https://www.wachatbot.ai/auth-register
[…] your chatbot, it’s time to make it functional. The next step is to connect your newly created ChatBot to WhatsApp. This integration allows your bot to communicate with customers through WhatsApp within the Wachat […]