

In the world of customer engagement, being able to communicate directly with your customer is key, and Wachat Bot makes it simpler for businesses. After setting up your chatbot and connecting it with WhatsApp, the next crucial step is creating contacts. This blog post will guide you on how to create and manage contacts in Wachat Bot.
Step 1: Navigate to the Contacts Page
Click on the “Campaigns” icon from the side menu on Wachat Bot. This will open the Campaigns page.
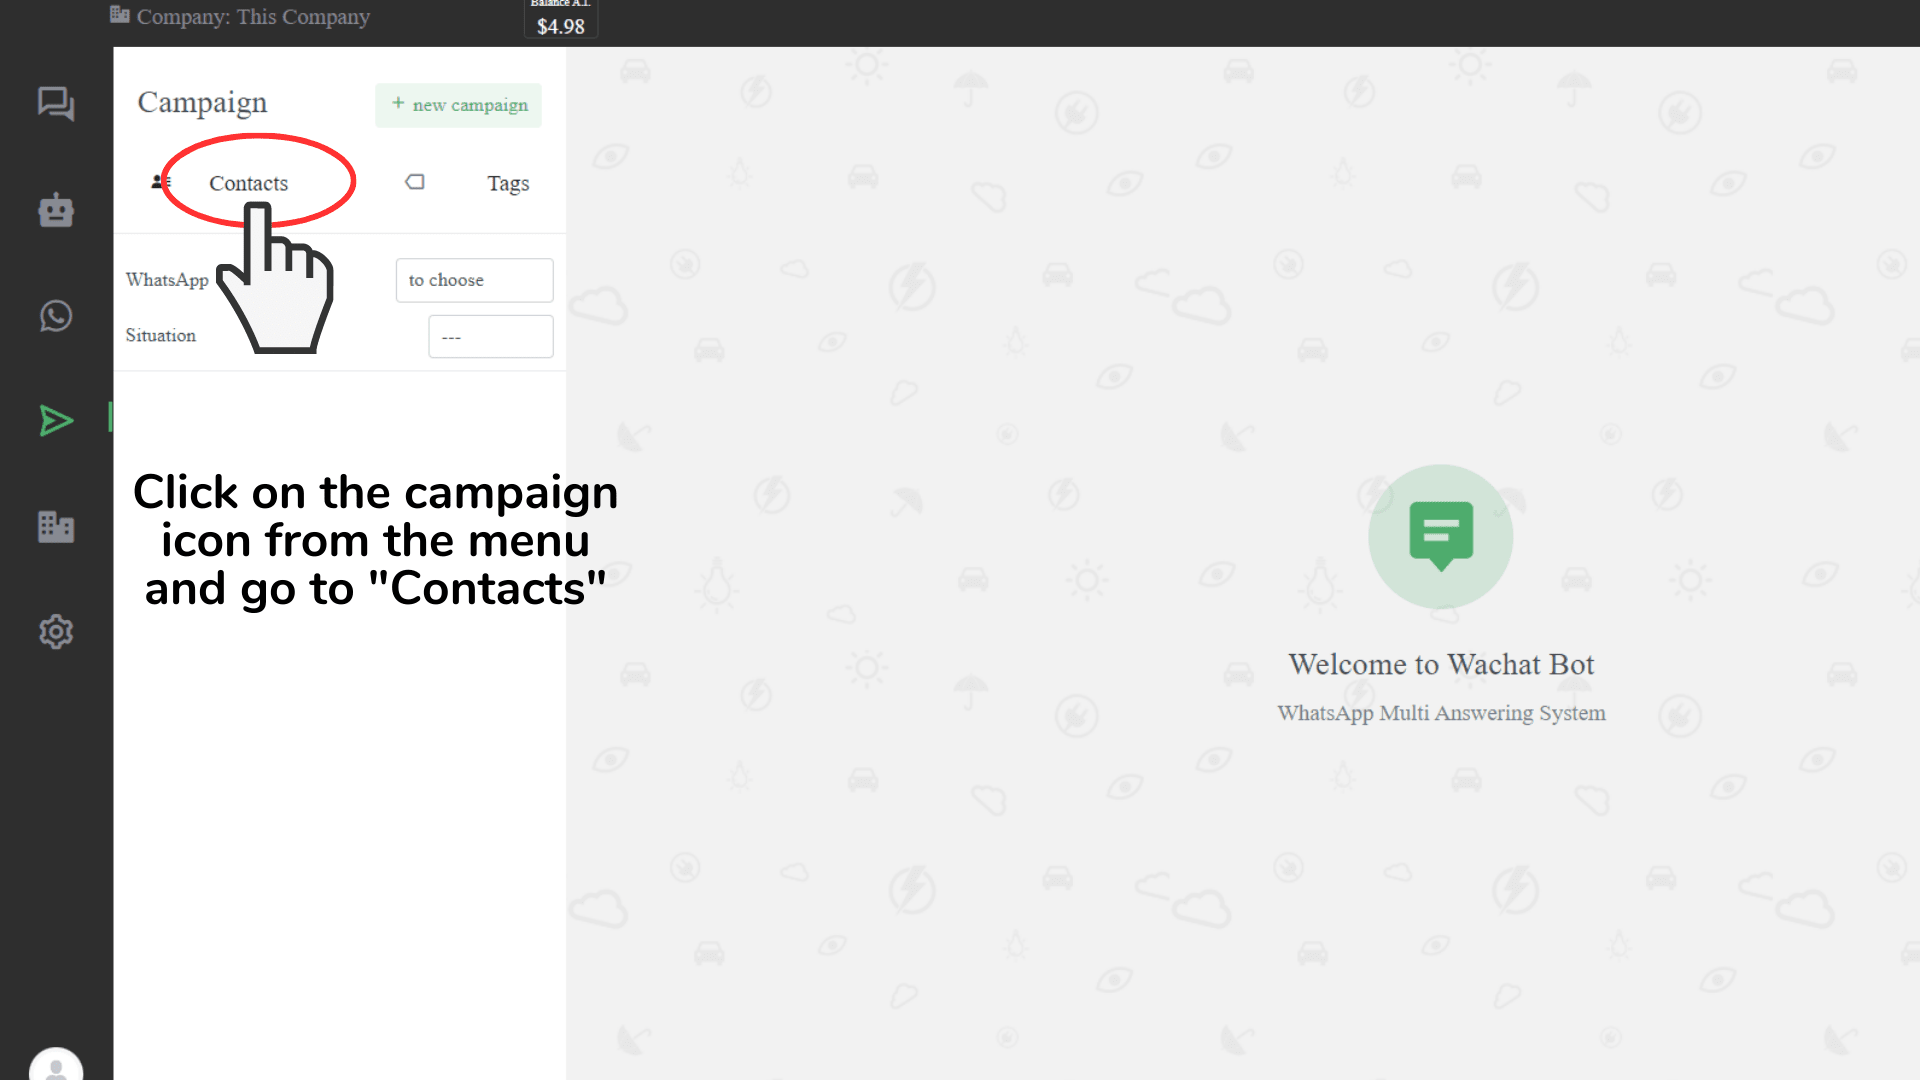
From here, look for the “Contacts” button located in the top left corner and click on it. This will take you to the Contacts page, where you will set up your contacts.
Step 2: Setting Up a Contact Tag
On the Contacts page, the first task is to set up a Contact Tag. These tags act as indicators of the type of contacts you’re creating.
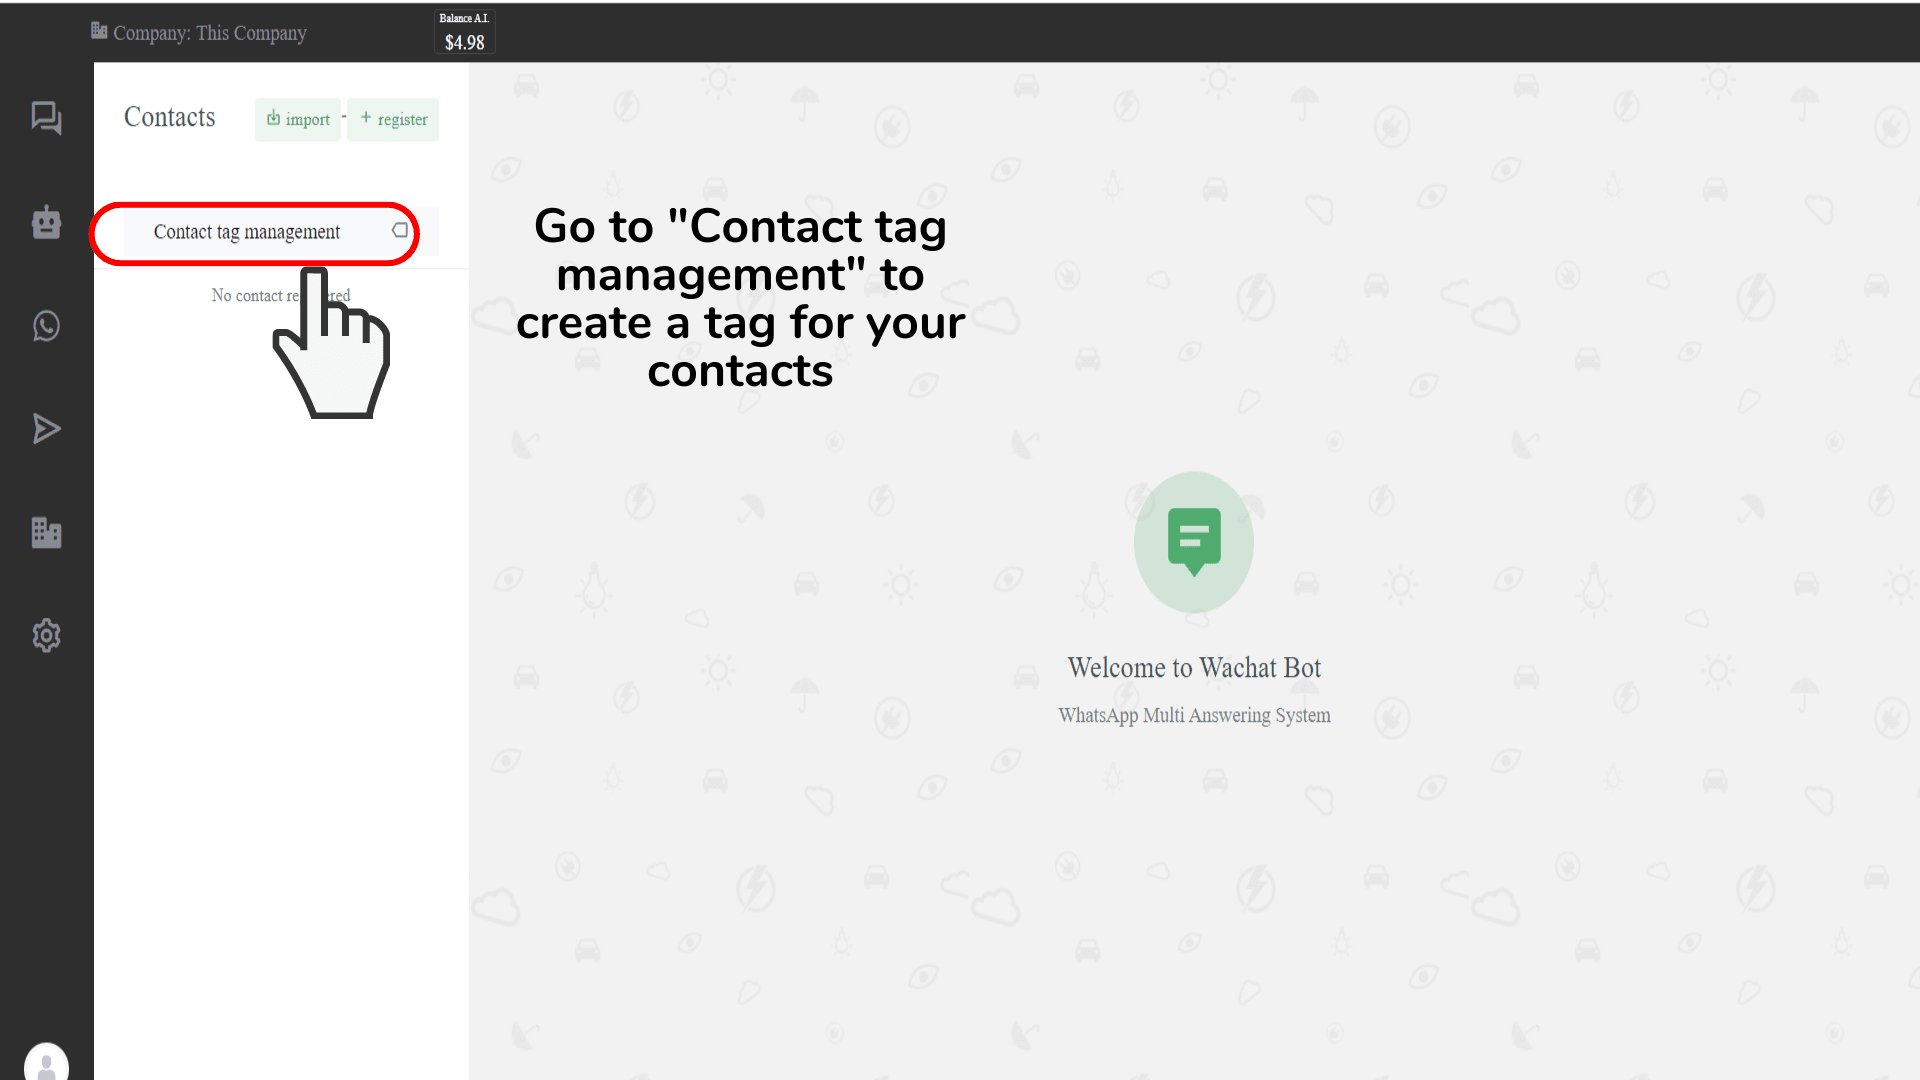
To create a contact tag, click on the “Contact tag management” button located on the top left corner of the Contacts page. This will take you to the Contact Tag Management page.
Step 3: Creating a New Contact Tag
Creating a new contact tag is easy. Simply click on the “+ new tag” button found on the top left corner of the Contact Tag Management page.
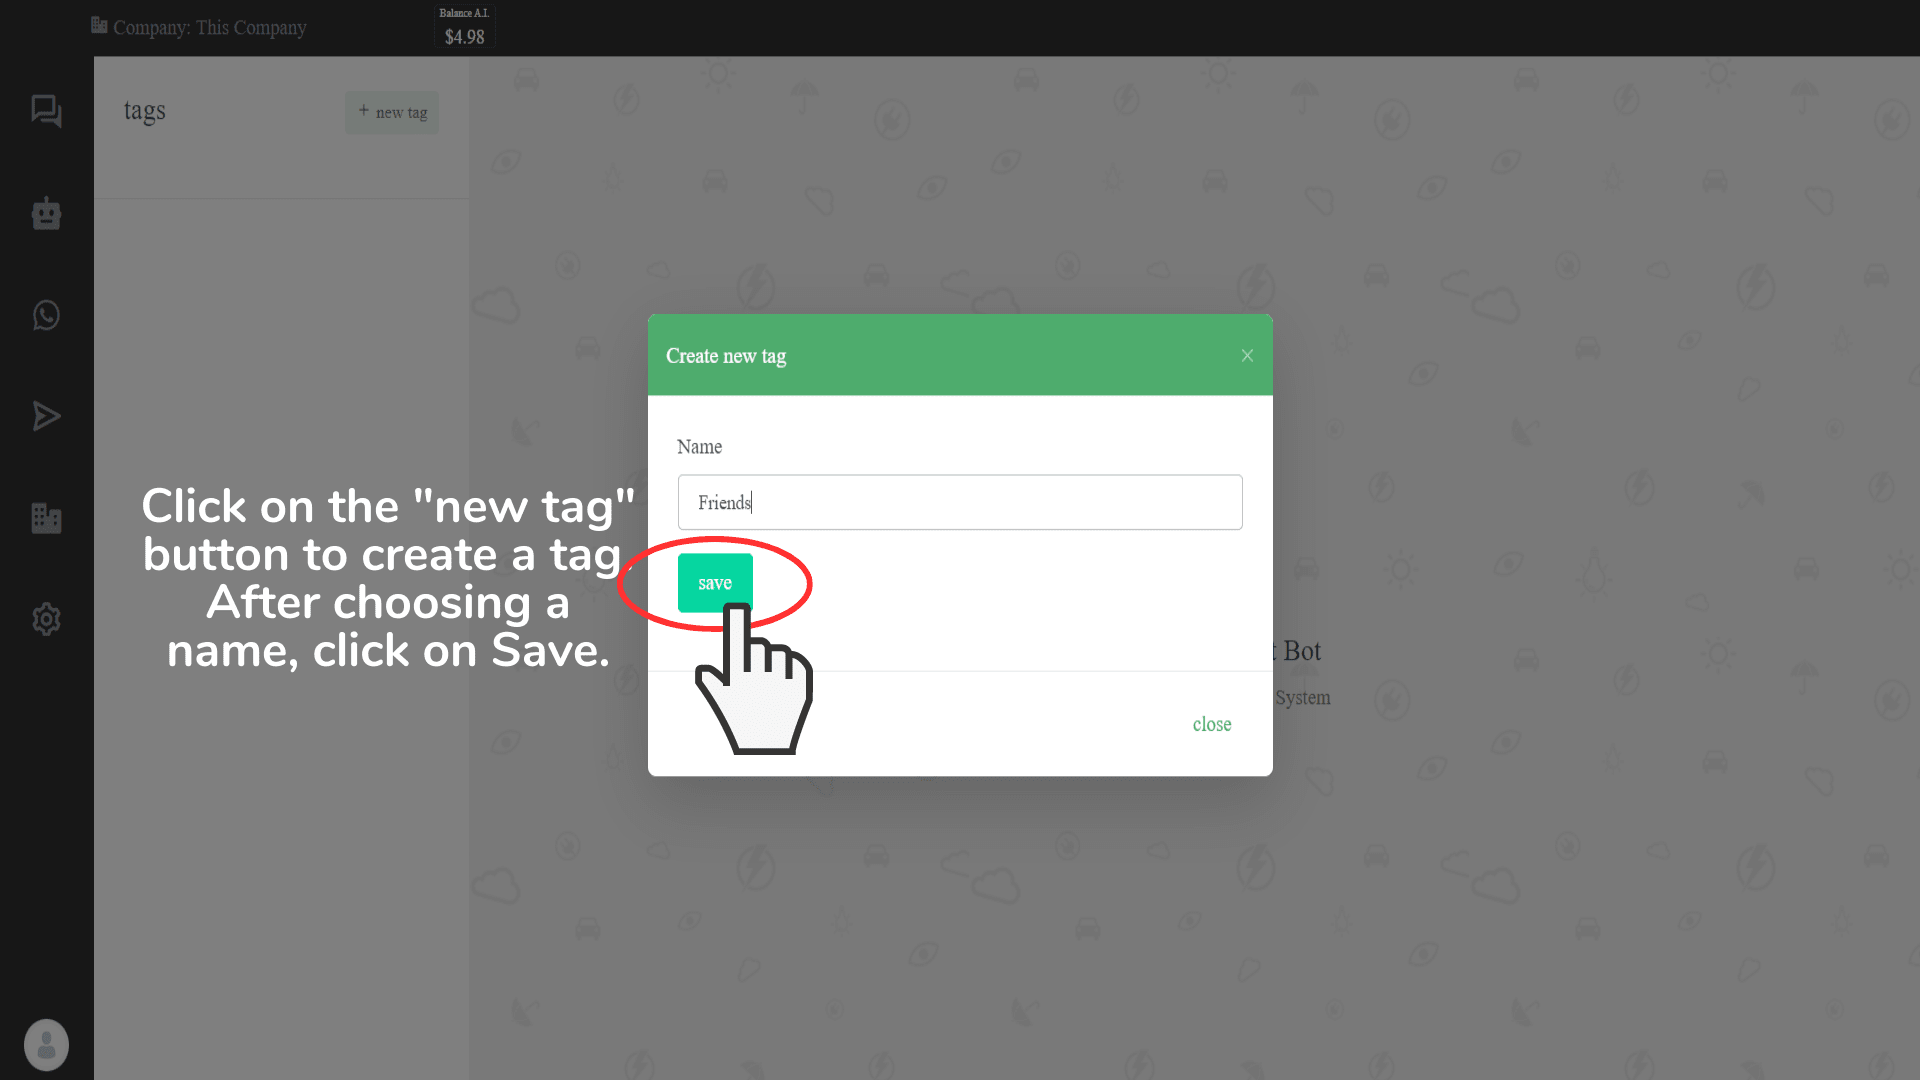
From there, you’ll need to assign a tag name. This can be based on your segmentation strategy – for example, “Potential Clients,” “Existing Clients,” “VIP Clients,” and so on. Once you’re satisfied with the tag name, click on “Save”. You can repeat this process to create multiple tags, which can be useful if you plan to differentiate your contacts.
Step 4: Adding Contacts on Wachat Bot
After setting up all the contact tags, head back to the Contacts page.
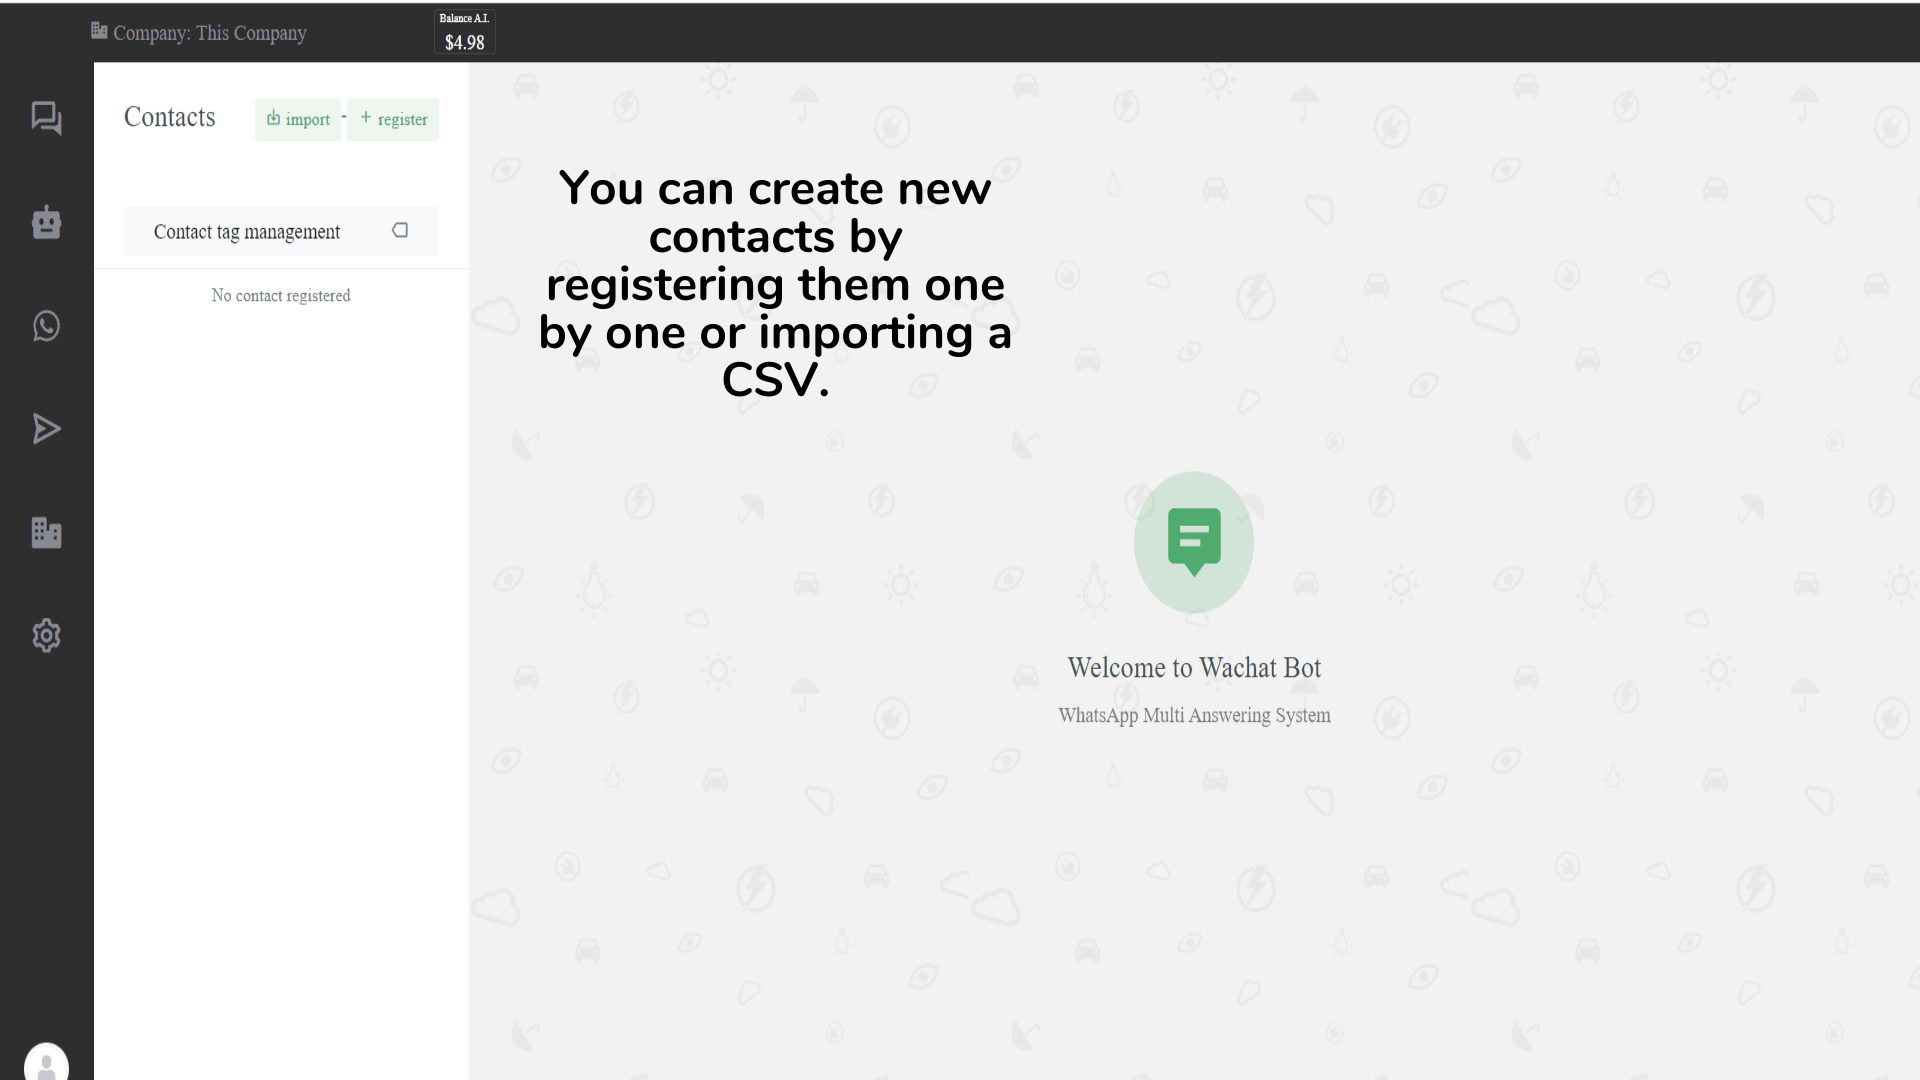
There are two ways to add contacts in Wachat Bot: you can either register contacts one by one or import multiple contacts using a CSV file.
Step 5: Registering a Contact Individually
To add contacts individually, click on the “+ register” button located on the top left corner of the Contacts page. A pop-up will appear asking you to fill in the contact details. These include the contact’s name, phone number, and the Contact Tag they belong to.
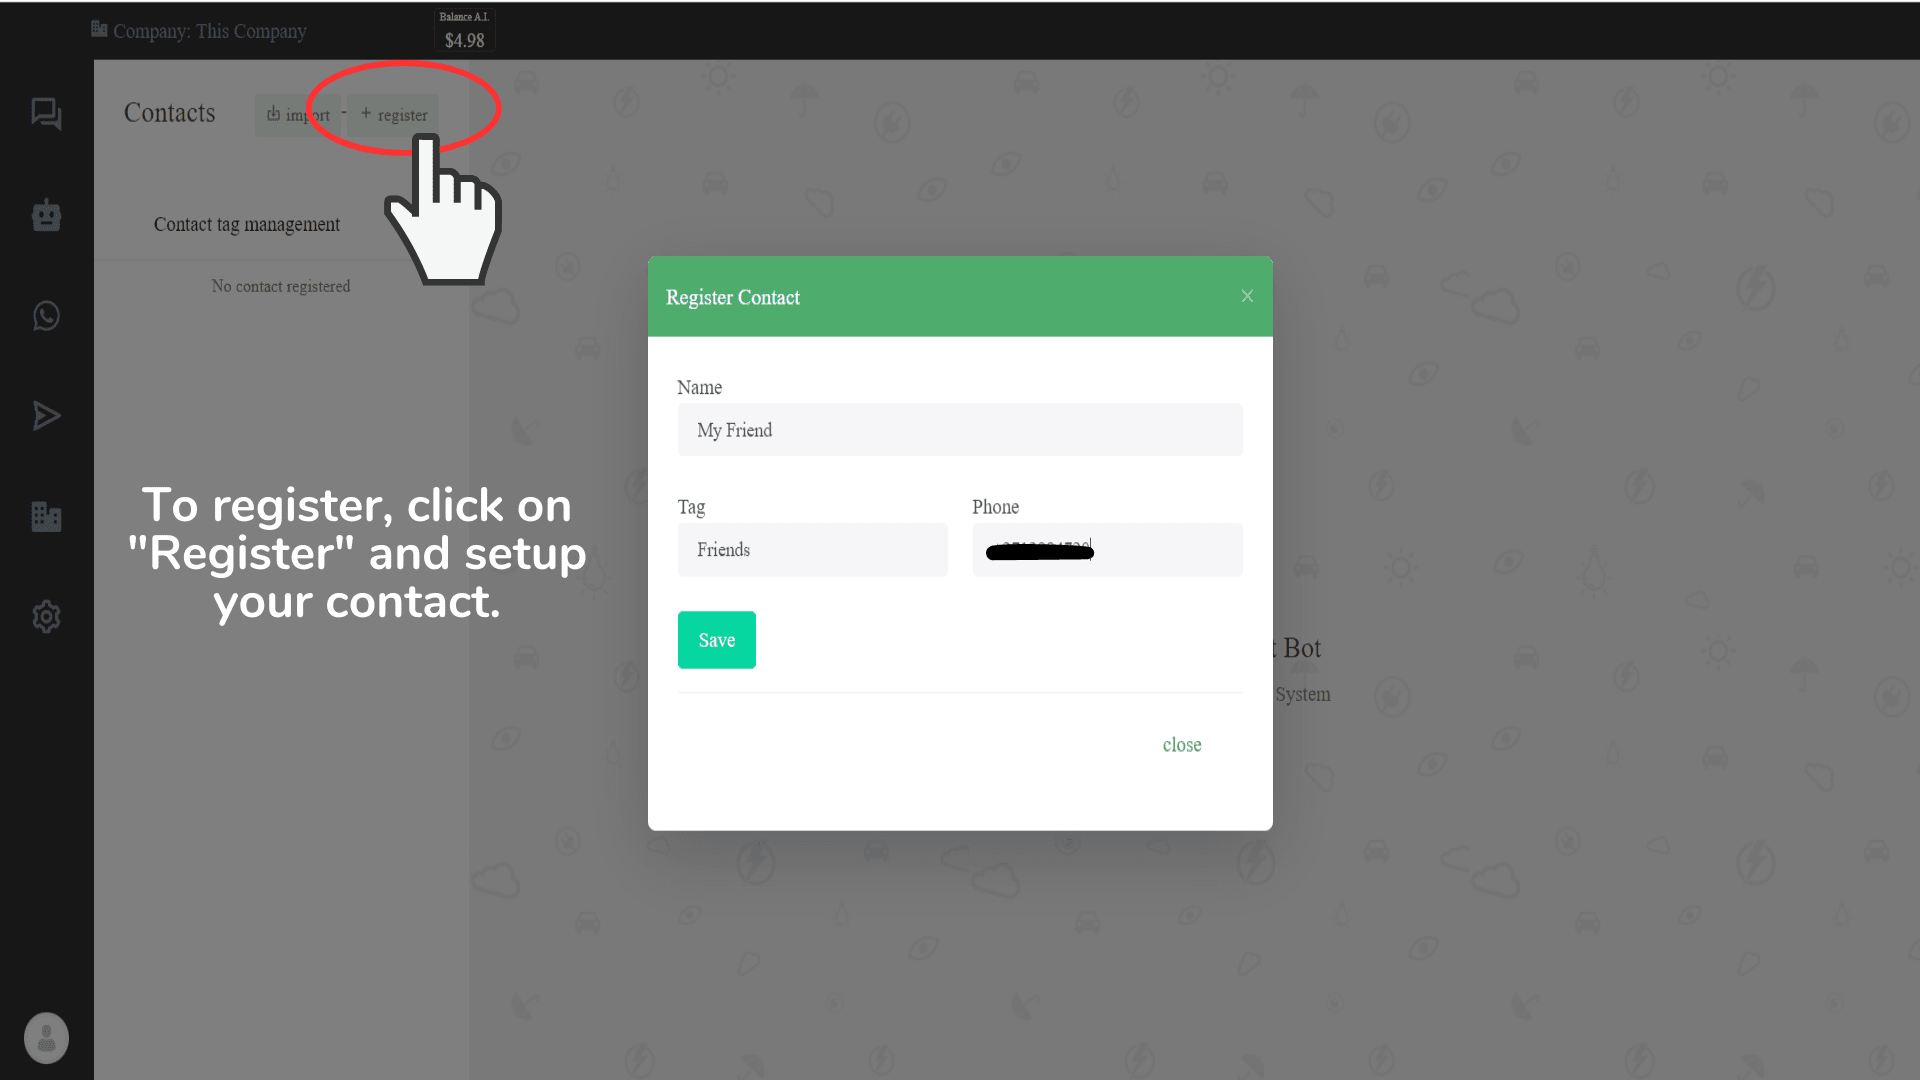
Once you’ve filled in the details, click on “Save”. This will create a new contact under the assigned tag.
Step 6: Importing Multiple Contacts
If you need to add multiple contacts at once, use the “+ import” button, also located on the top left corner of the Contacts page. This will open a pop-up asking you to select the Contact Tag your CSV contacts belong to and an upload option.
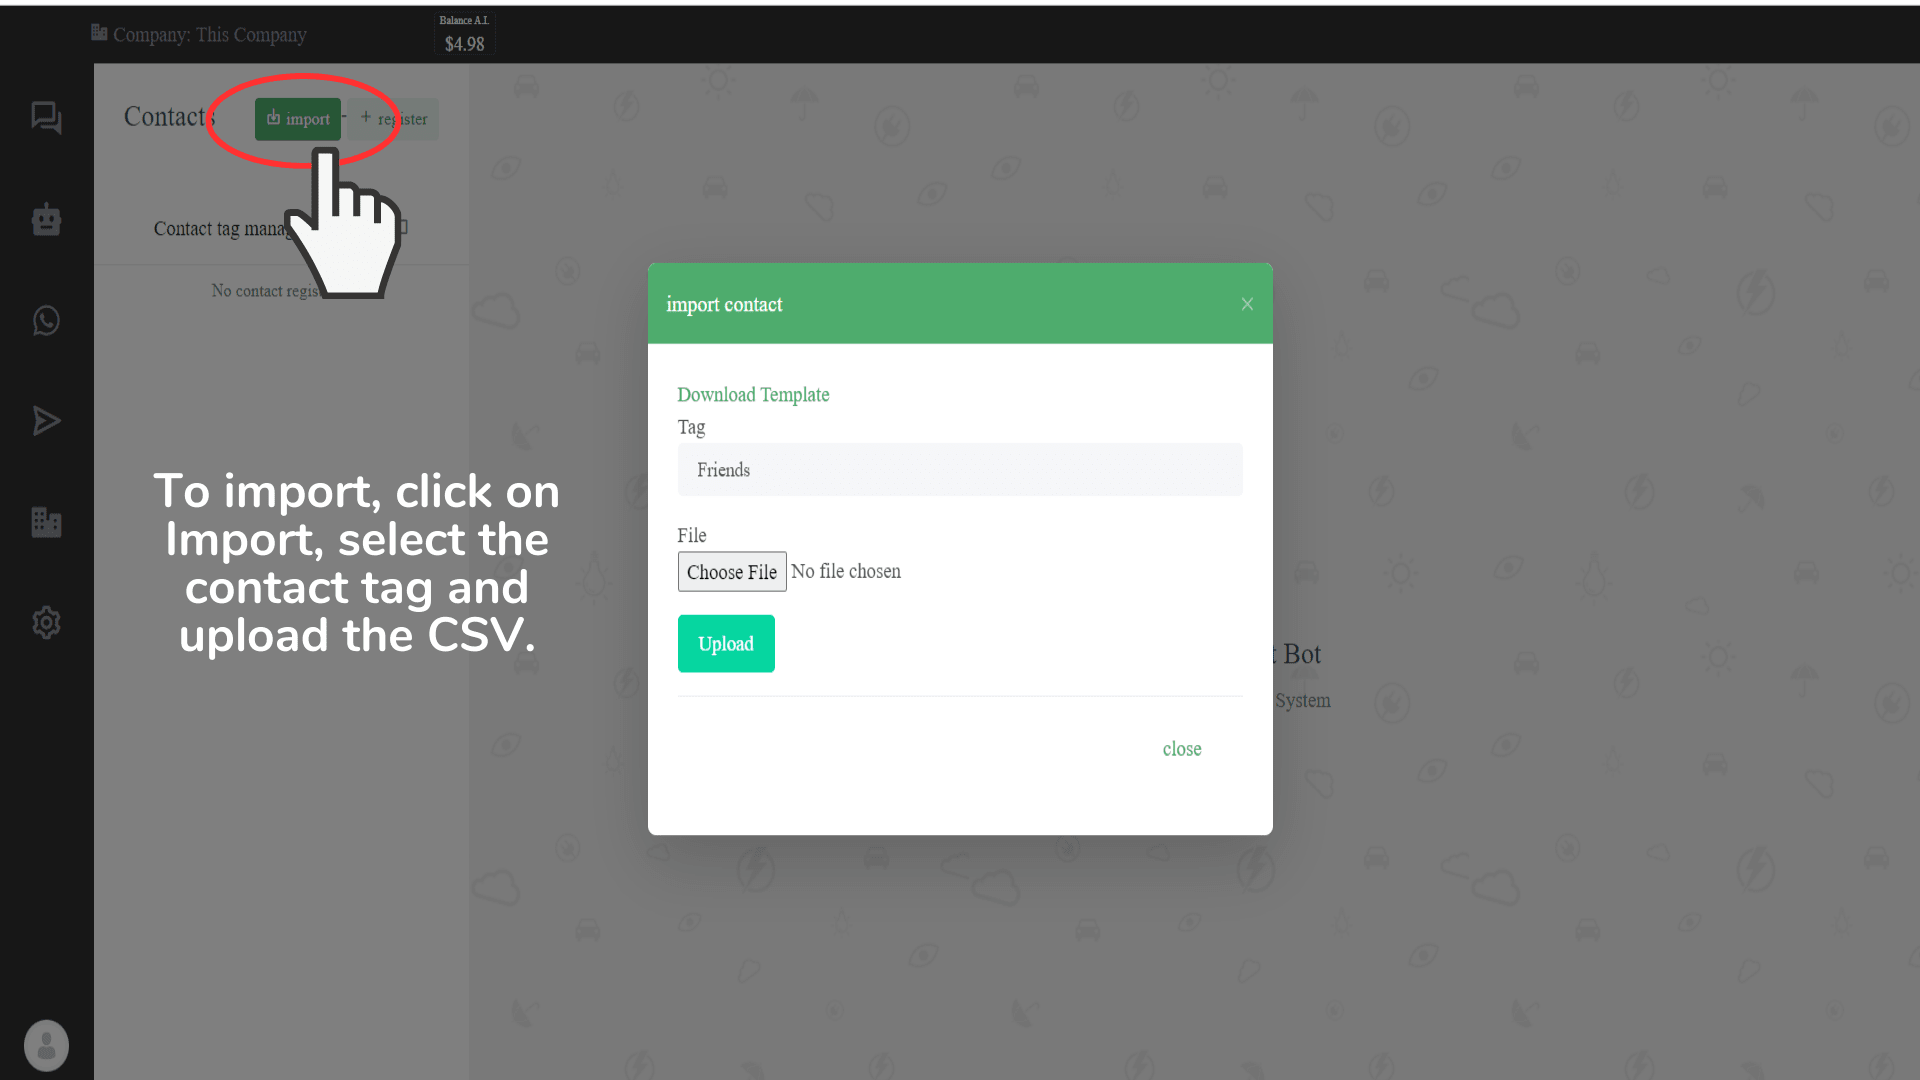
Here, you can upload your CSV file with all the contact details. This method allows you to create several contacts at once, saving you valuable time.
What’s Next?
After creating your contacts, the next step is to utilize these contacts effectively by creating a campaign. Campaigns are excellent for sending out WhatsApp newsletters and are instrumental in both retaining existing customers and reaching new ones.
To create an account, go to: https://www.wachatbot.ai/auth-register