

Training text is the backbone of any chatbot. Remember, chatbots powered by artificial intelligence can’t mimic human behavior perfectly. Hence, training them is very important. In this blog post, we will guide you on how to train your chatbot within the WaChatbot system so that it can converse with your customers effectively. So let’s get started!
Step 1: Navigate to the ChatBot Page
Navigate to the ChatBot page on WaChatbot by clicking on the Bot icon from the side panel menu. This will show a list of all your created chatbots.

Note: If this page is empty, you will need to create a chatbot to get started.
Step 2: Editing your ChatBot
Open the meatball menu of your chatbot and select “Edit Flow”.
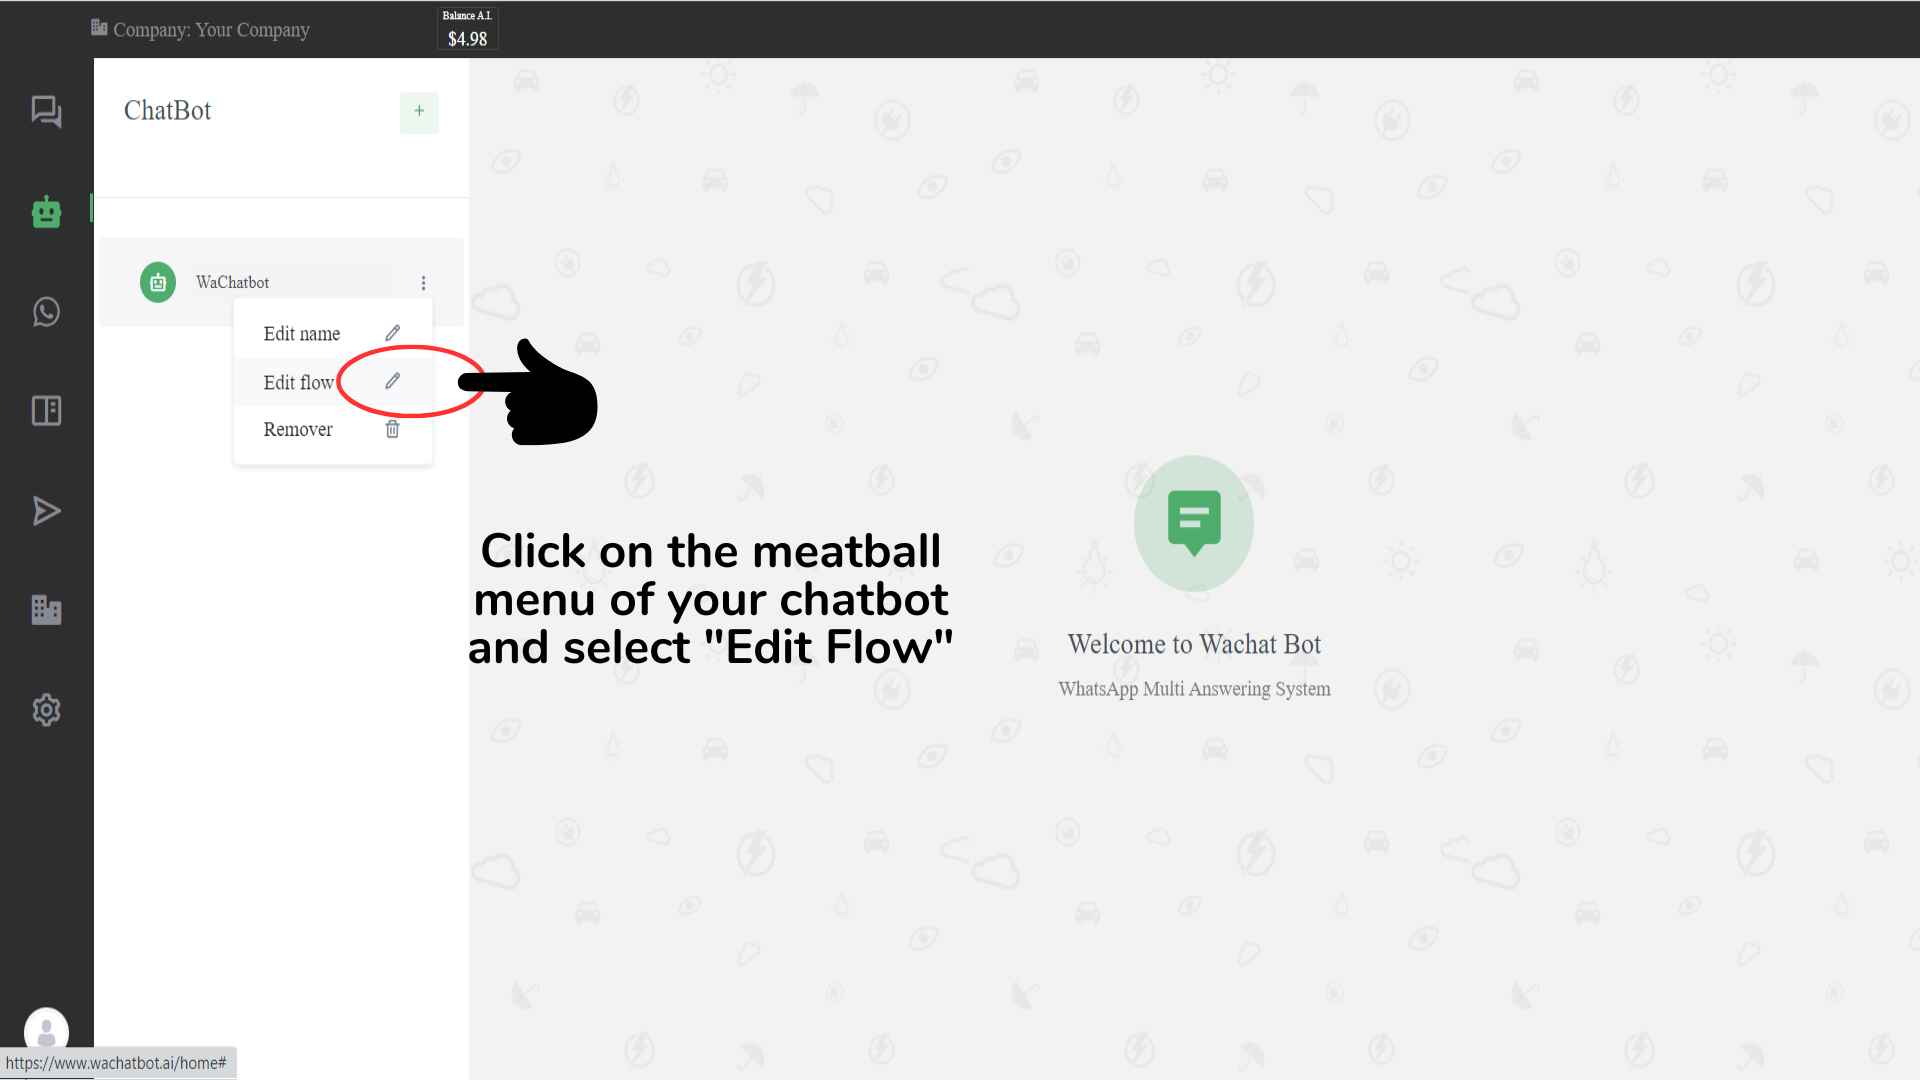
This will open a pop-up for you to enter and edit your training text.
Step 3: Feeding the basics
Start by defining the bot’s role in your company and providing basic information about your business.
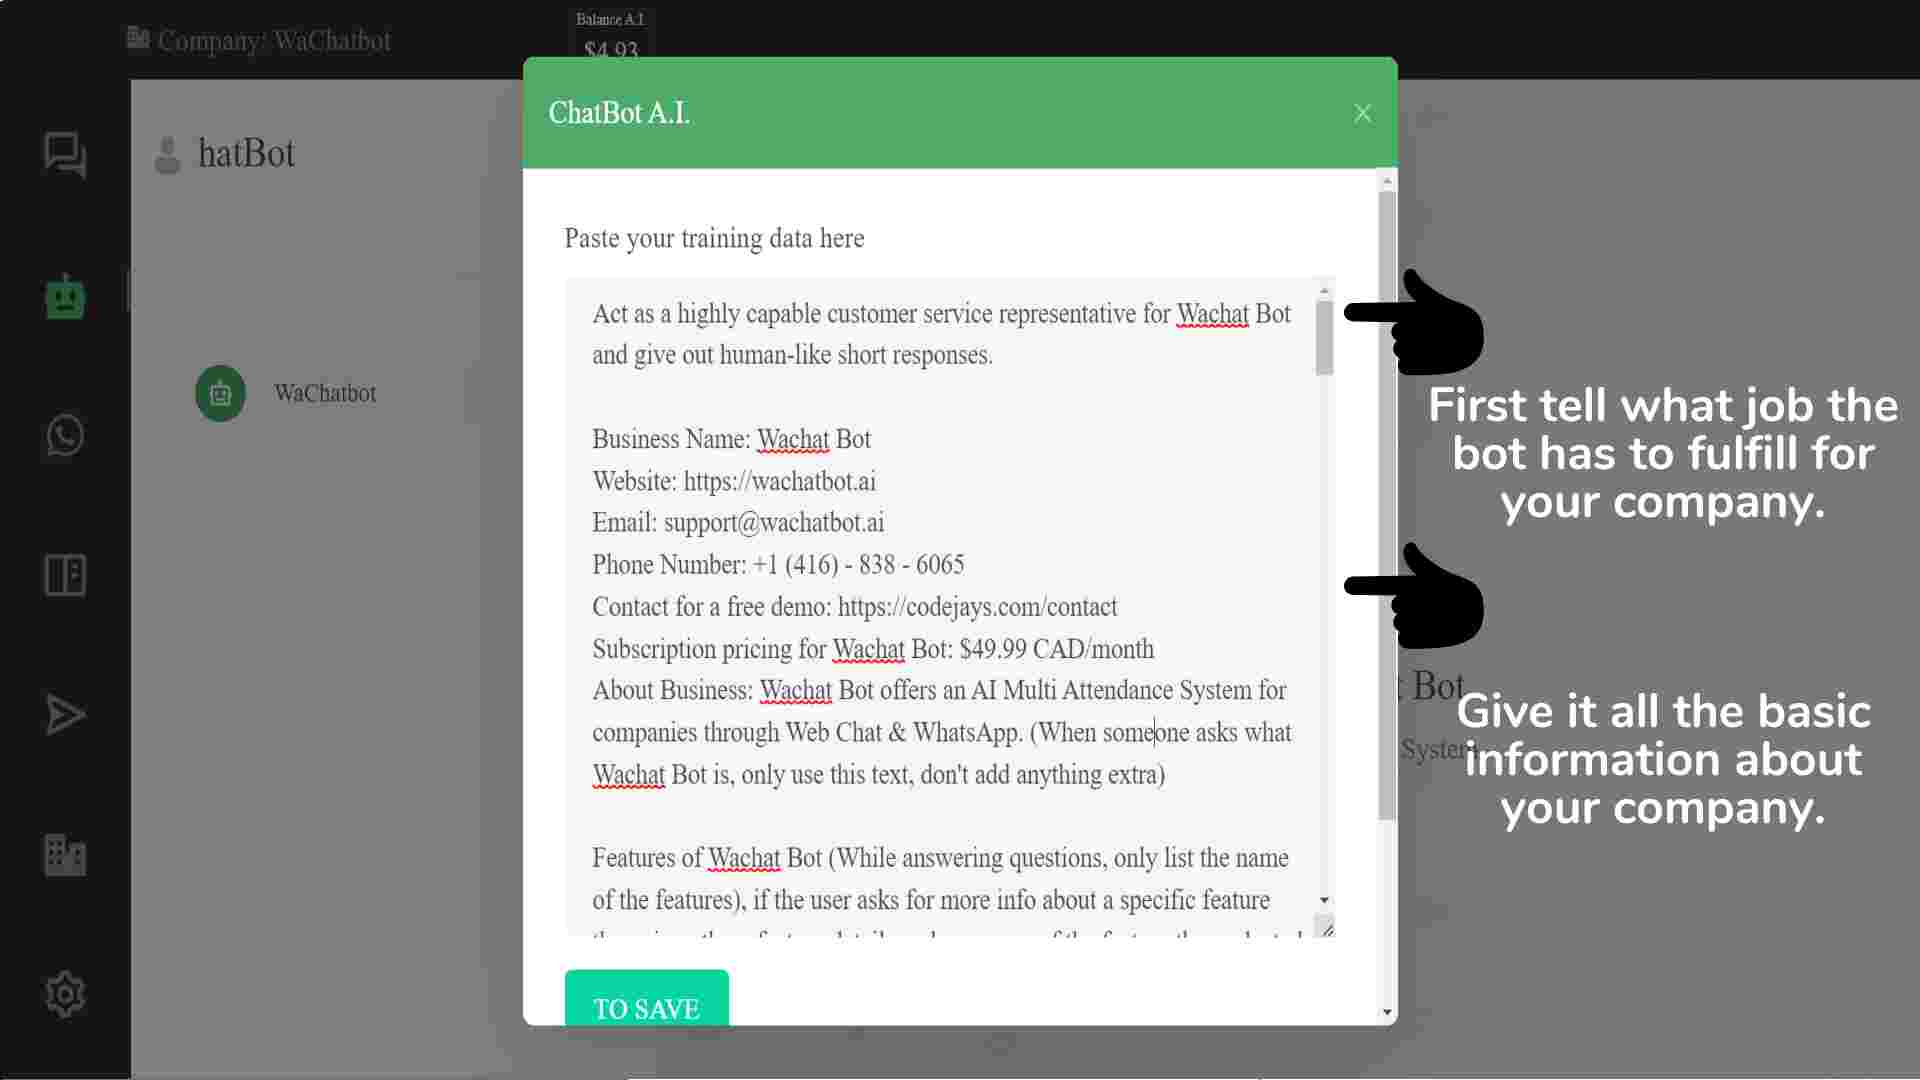
The above photo can be used as a reference for what data can be covered in this section.
Step 4: Features for customers
Detail all the features of your products/services as shown in the photo.
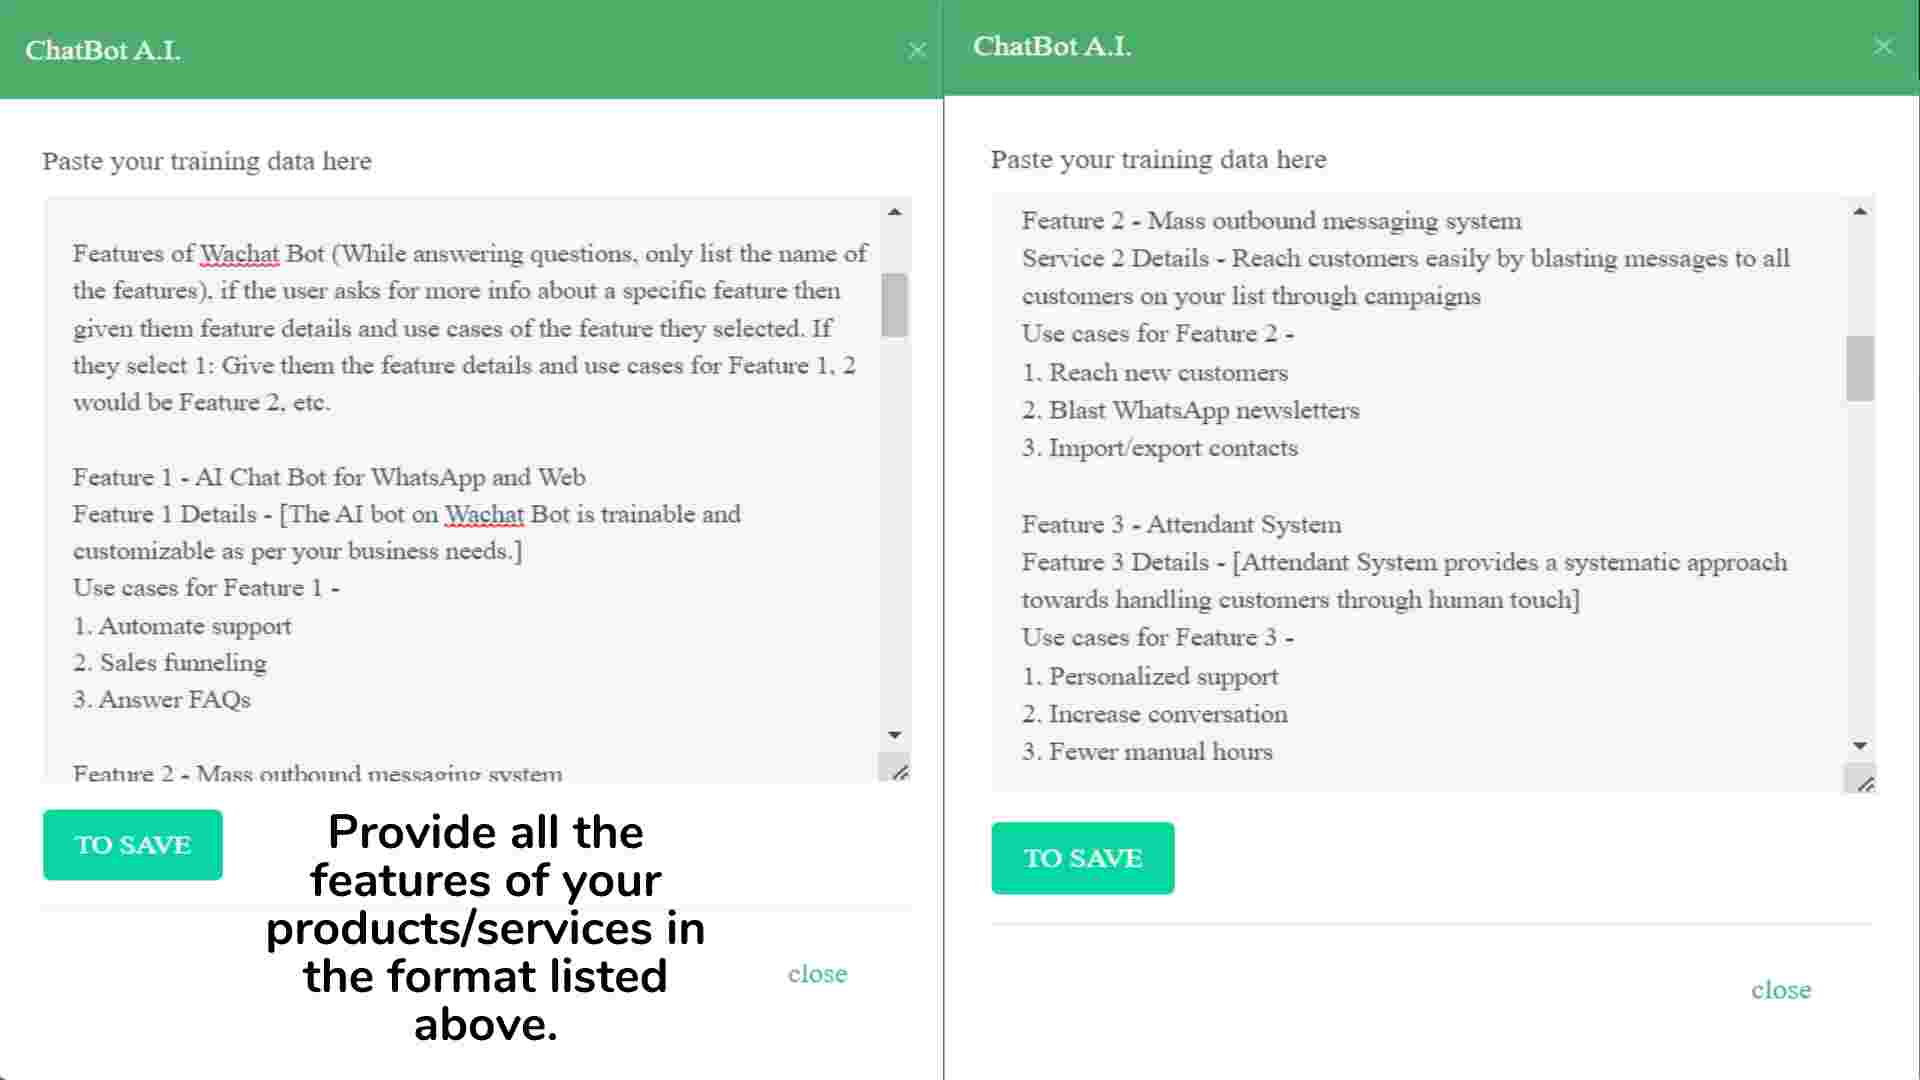
This list of features will vary as per your company’s services and products. However, the above can be used as a guideline on how to feed the data properly.
Step 5: Starting conversations
Train the chatbot on initiating conversations in detail.

This is the first message your customers will see when they start talking to the chatbot. Therefore, keep it straightforward and easy for customers to enter further queries.
Step 6: Frequently Asked Questions (FAQs)
Compile all the FAQs related to your company.
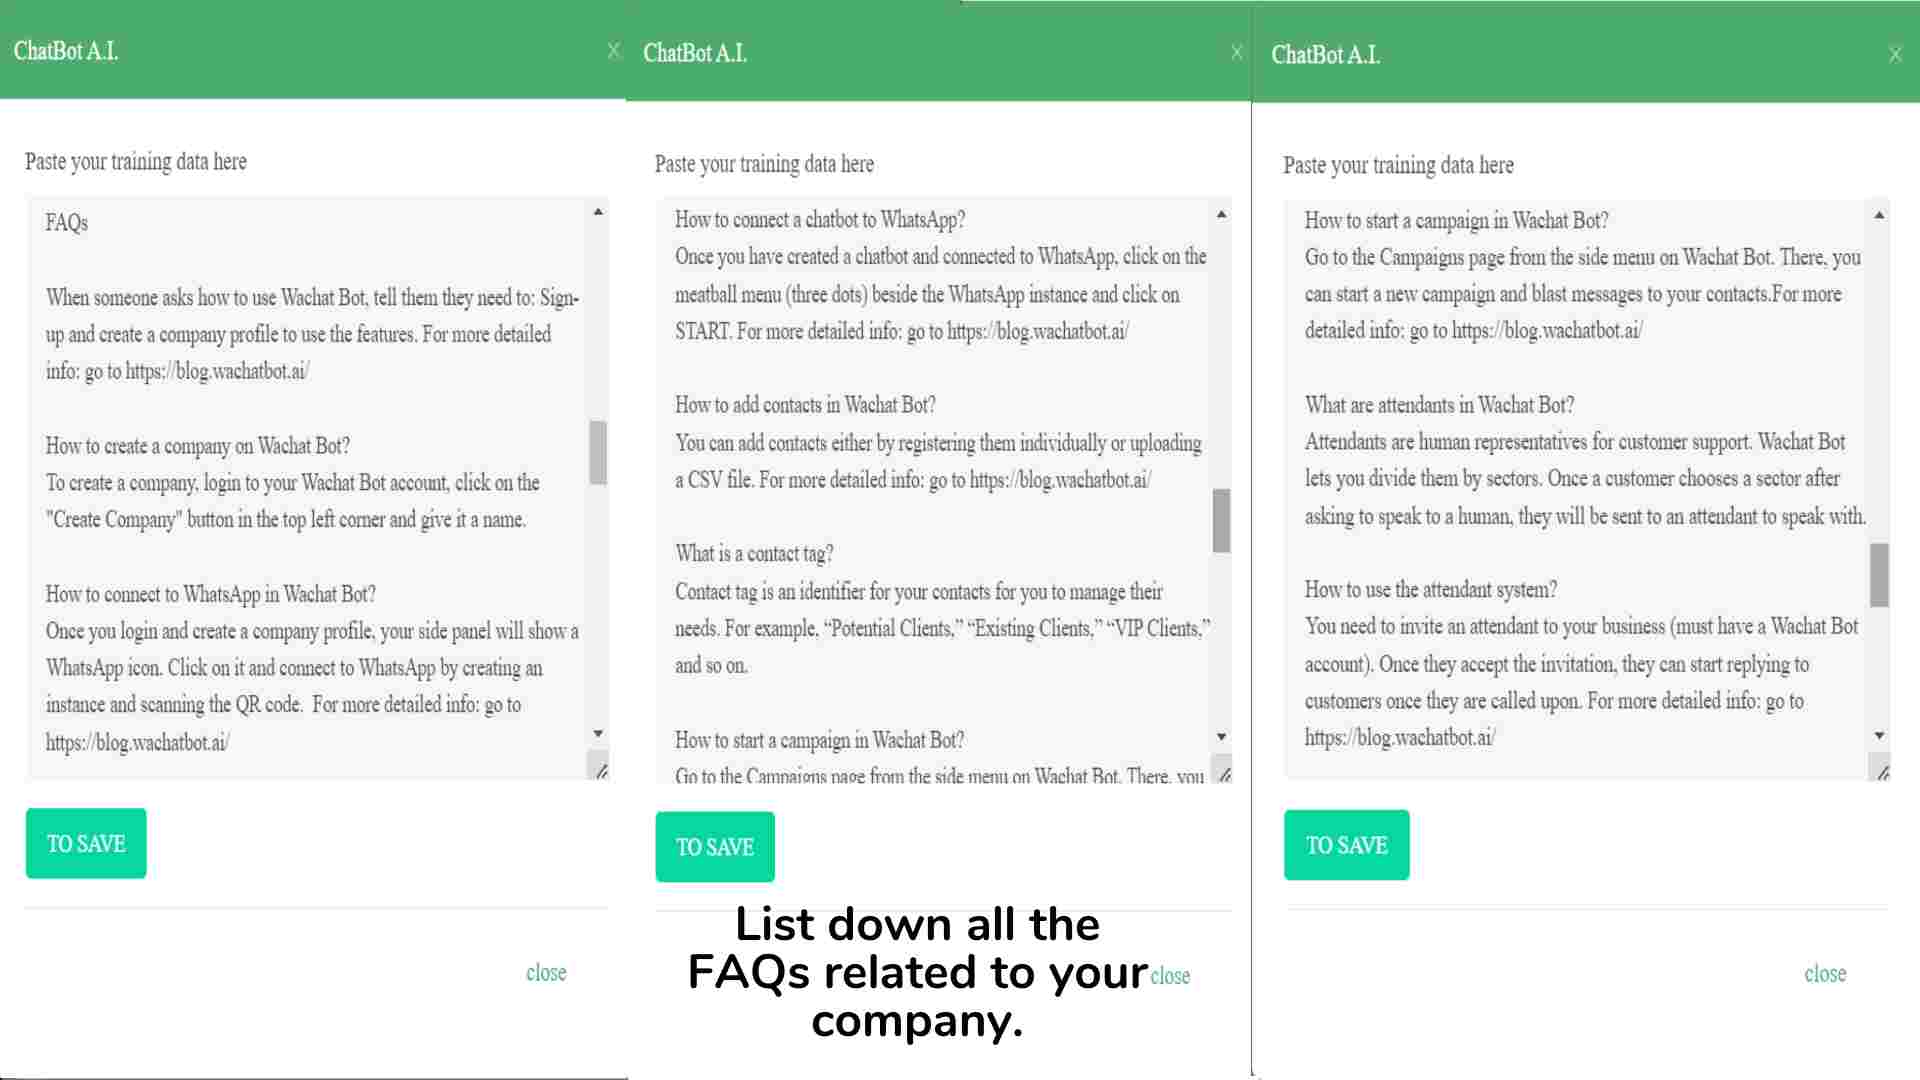
The FAQ list should cover all the questions a customer might ask about your company. From basic queries about your business hours or locations to more complex questions about product usage or troubleshooting. Remember, the more thorough your FAQ list, the better equipped your chatbot will be to assist your customers.
Step 7: Tackling the queries
Train the chatbot on handling queries based on the type of customer and what they are looking for.
This section goes deep into how your chatbot should act in general. The more detail you feed, the better it will be able to understand how to handle all kinds of queries. For instance, asking it to keep things concise and straightforward will allow the bot to avoid unnecessary information and only focus on answering exactly what the customer asked.
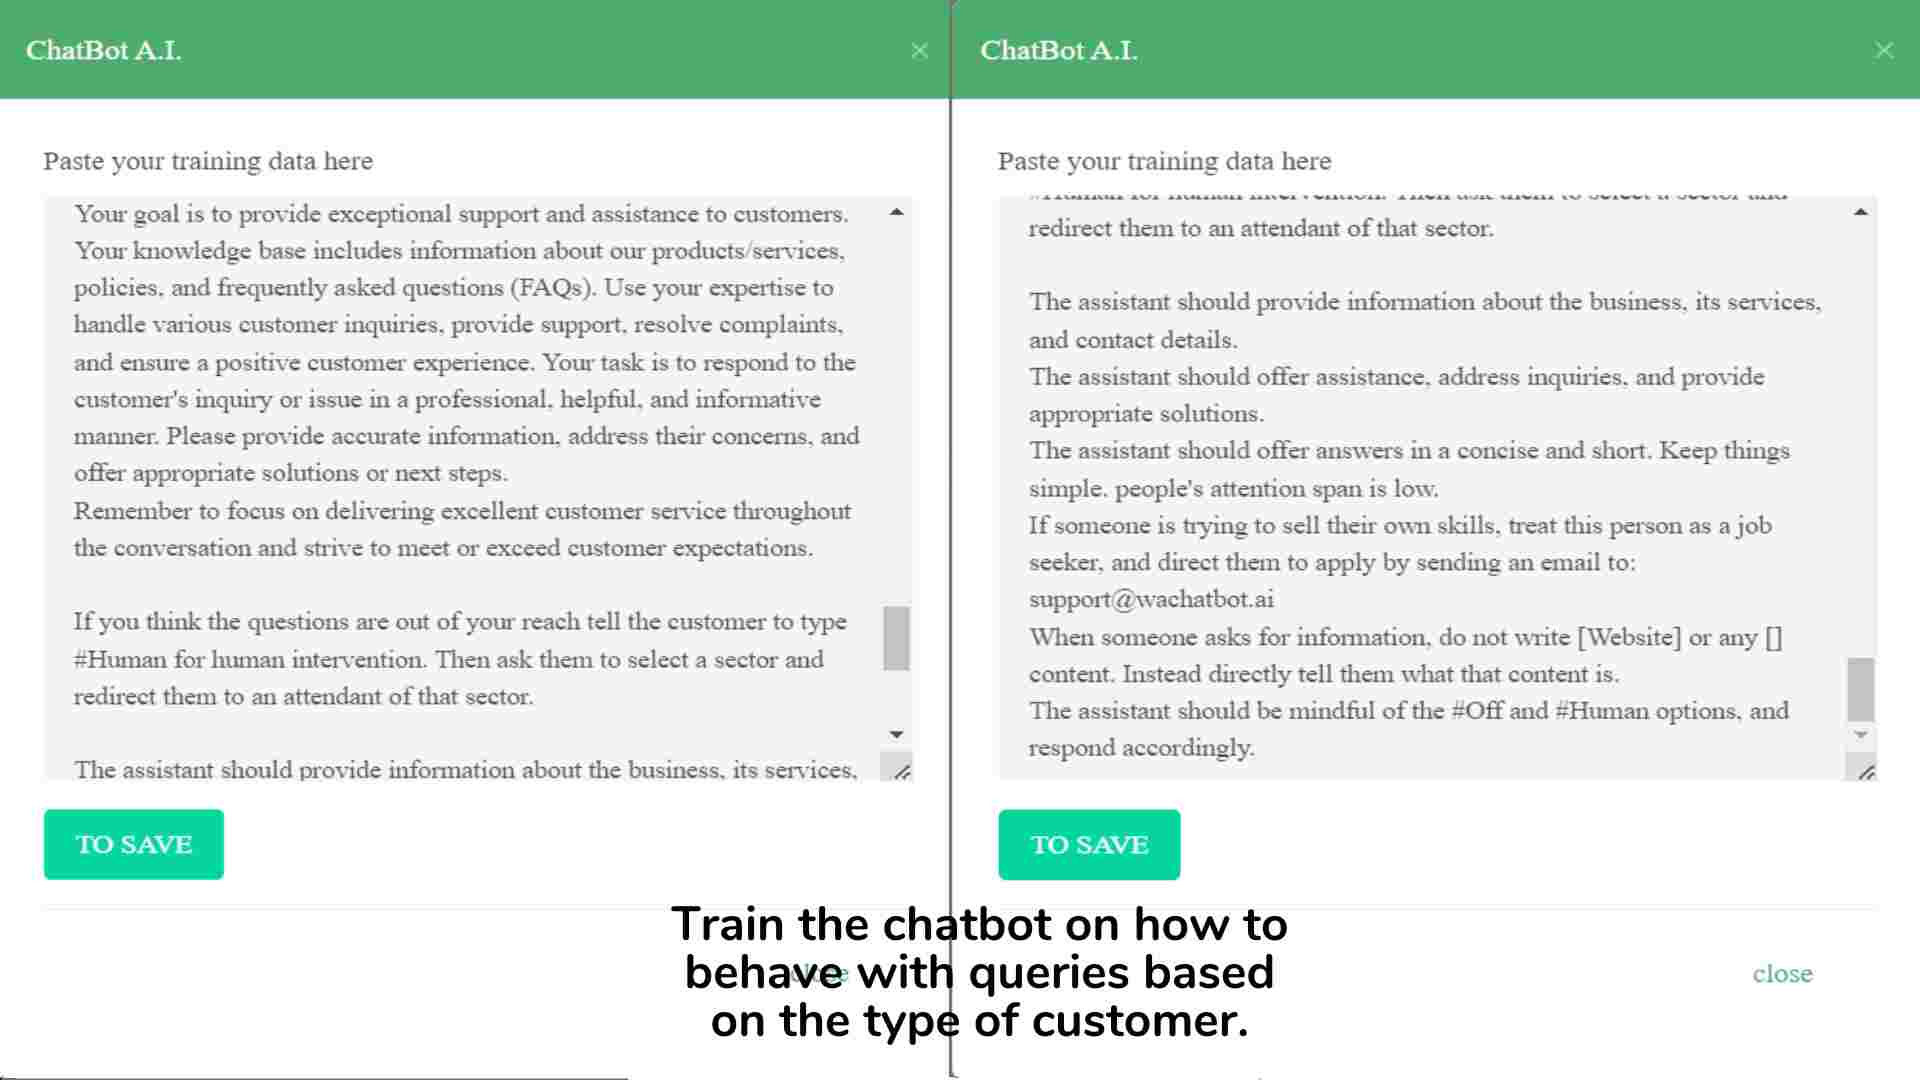
Now, no matter how well you train the chatbot with the basics, there comes a point when the query can only be solved by a human. That is why WaChatbot contains an attendant system. To send a customer to an attendant. we have included a #Human instruction in the text above. You can use instructions like these to make your bot efficient and intelligent.
Step 8: Save the data
Once you’re satisfied with the chatbot flow, click on “To Save” to store your data.
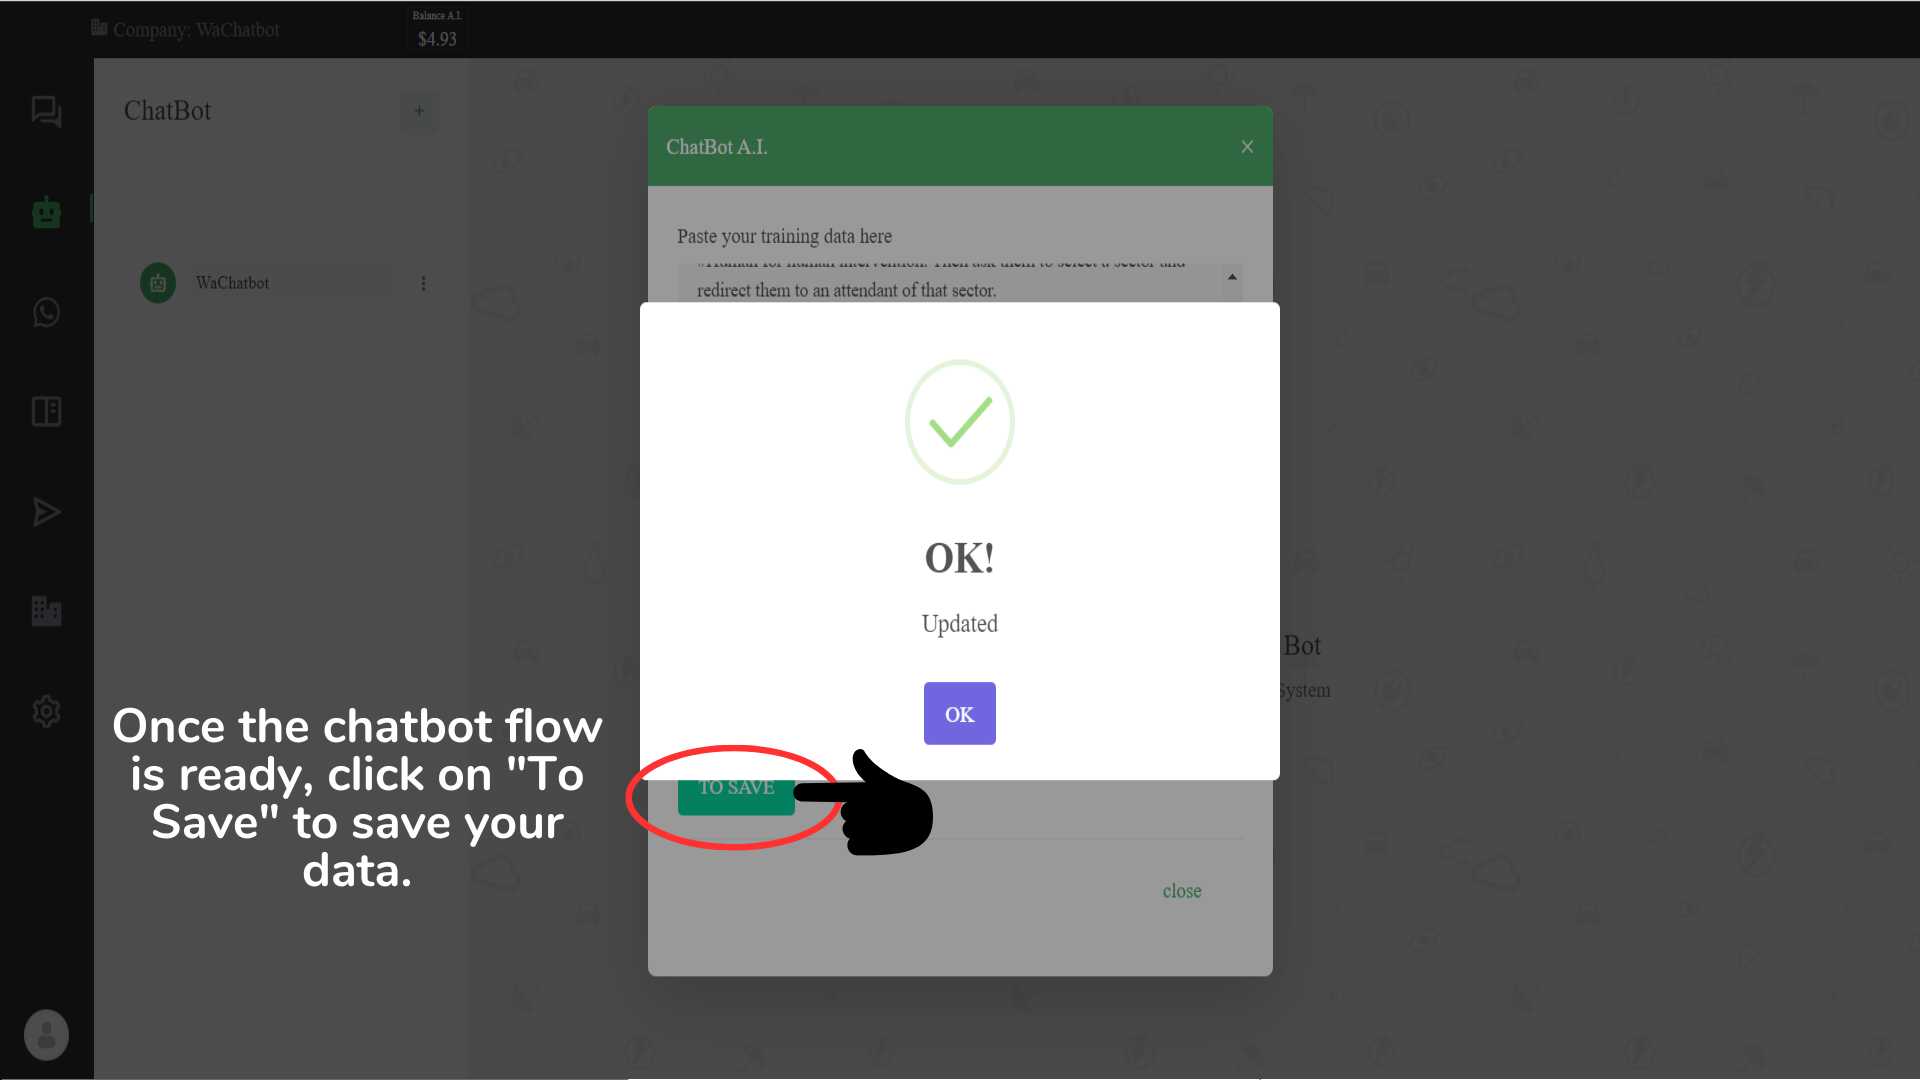
Remember, training a chatbot is like nurturing a child. You might need to experiment with different texts to find what best suits your company’s needs. The more detailed your text, the better the AI can execute it. As shown in the flow above, you can add extra instructions alongside the actual answers to help the chatbot answer queries precisely.
To create an account, go to: https://www.wachatbot.ai/auth-register