

The attendant system on Wachat Bot provides the essential human touch that makes a world of difference in customer service. Once you have successfully set up the attendant system, it’s time to learn how to use it effectively. In this blog post, we will take you through the steps of how an attendant can manage and respond to customer chats.
Step 1: Receiving and Accepting the Invitation
As an attendant, you will receive an invitation from the business to join their team. This invitation will appear as shown in the image below.
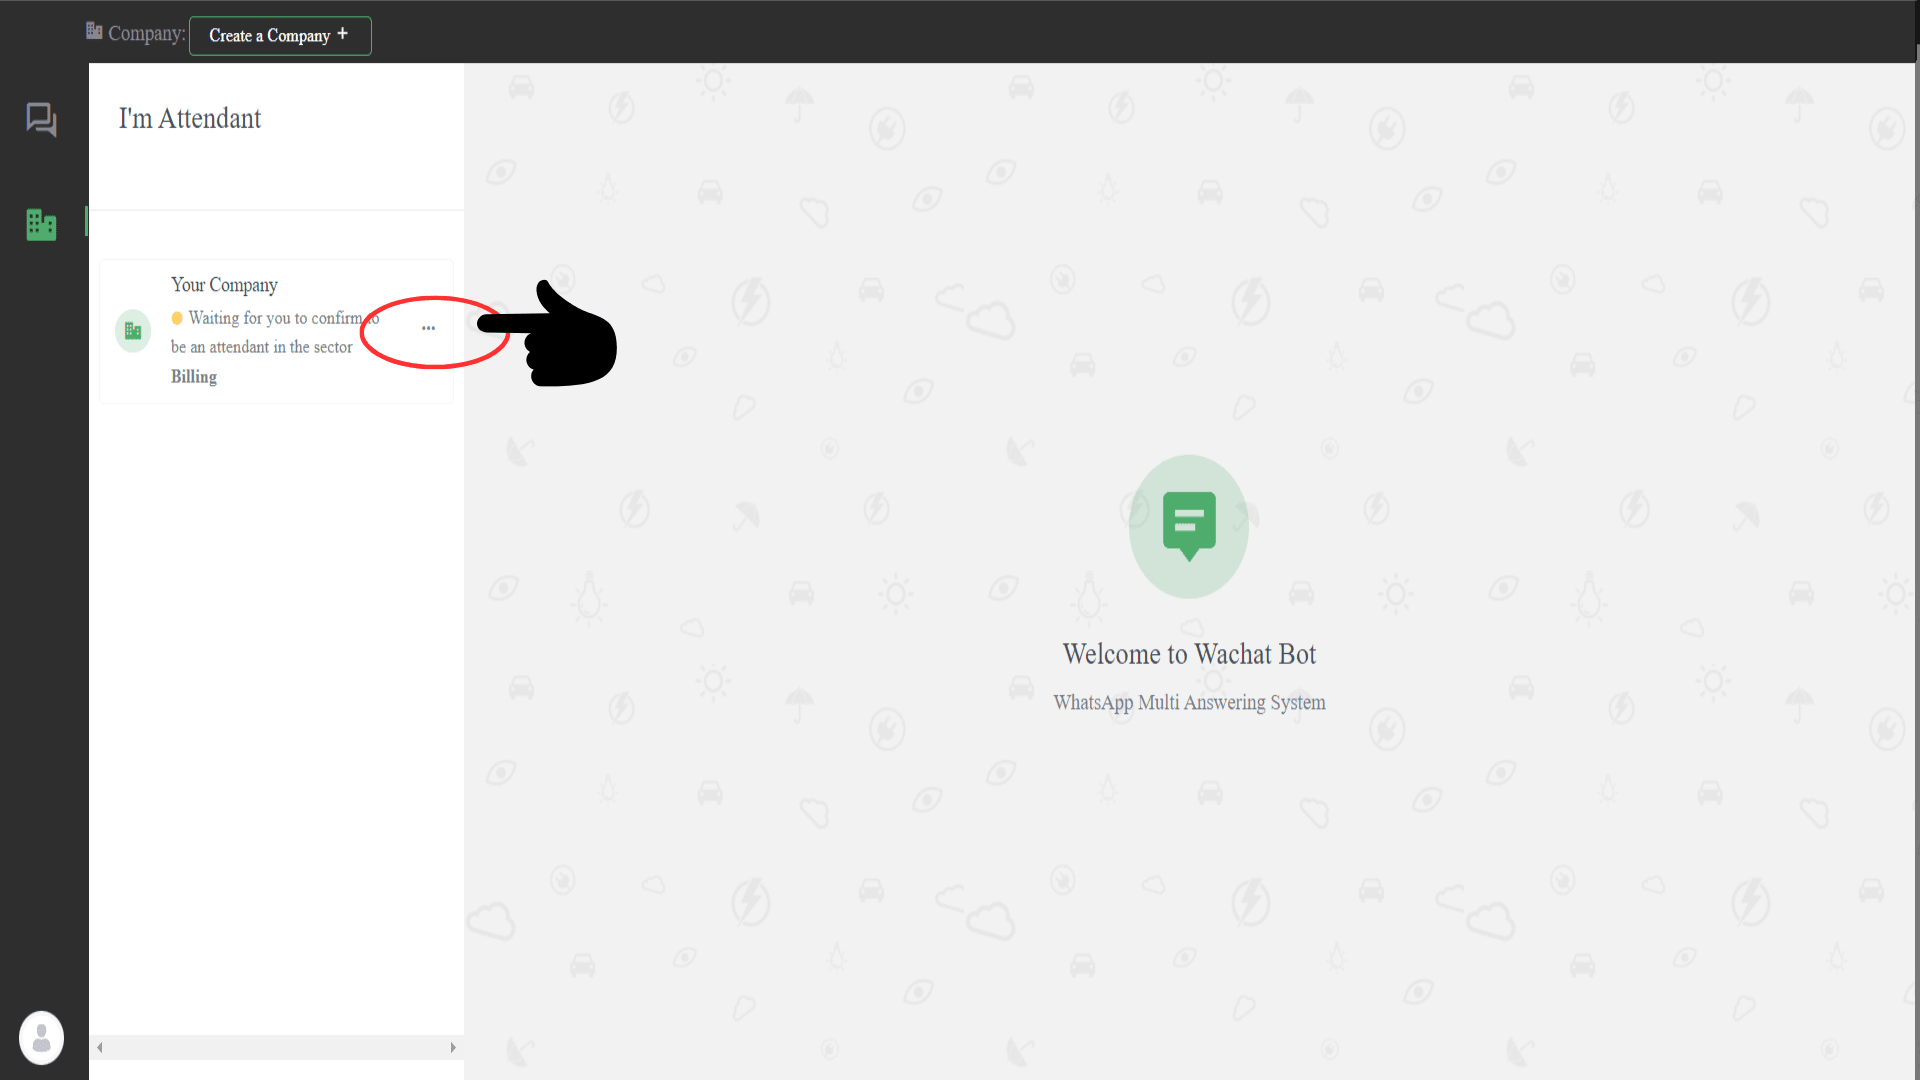
To proceed, click on the meatball menu (three vertical dots) beside the invitation.
Step 2: Confirming Your Role as an Attendant
After clicking on the meatball menu, you’ll be presented with two options: Accept or Decline the invitation.
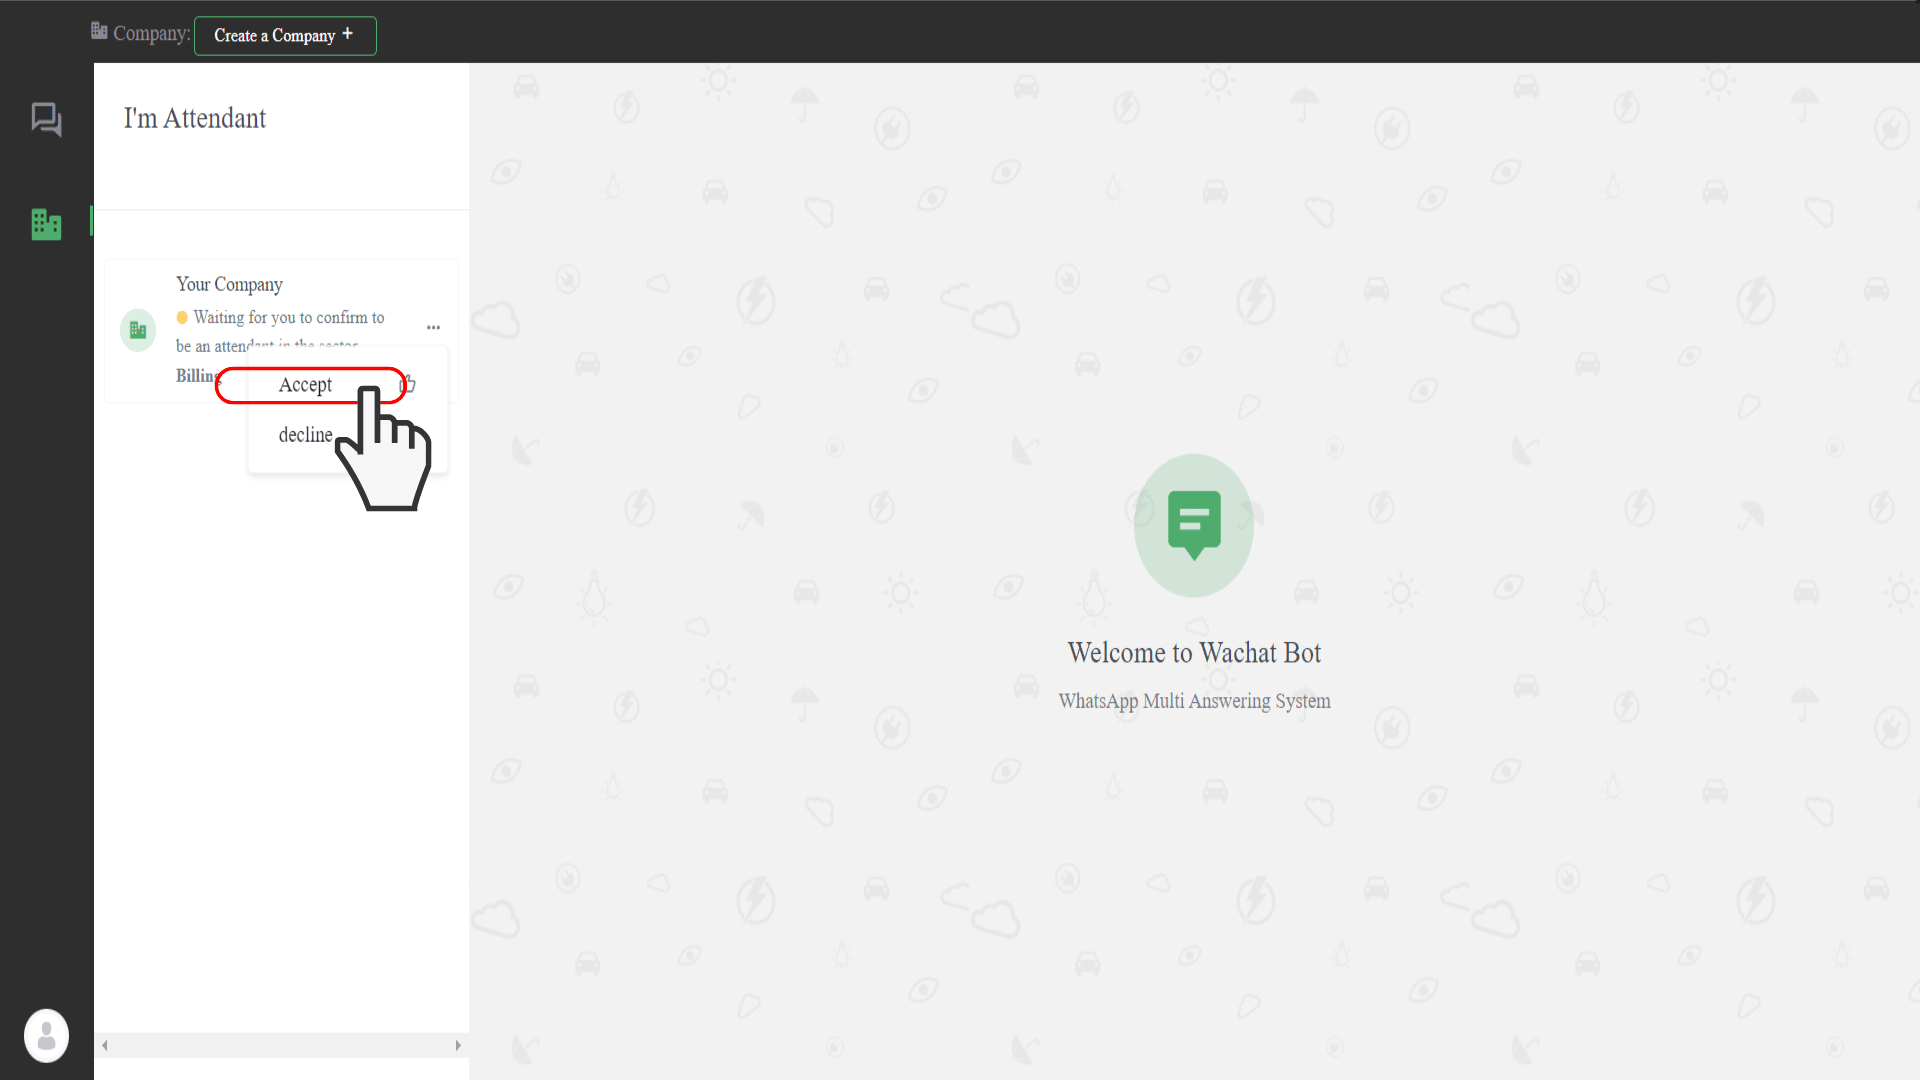
To officially become an attendant for the business, click on “Accept”. This will open a confirmation pop-up where you should choose “Yes” to confirm your new role.
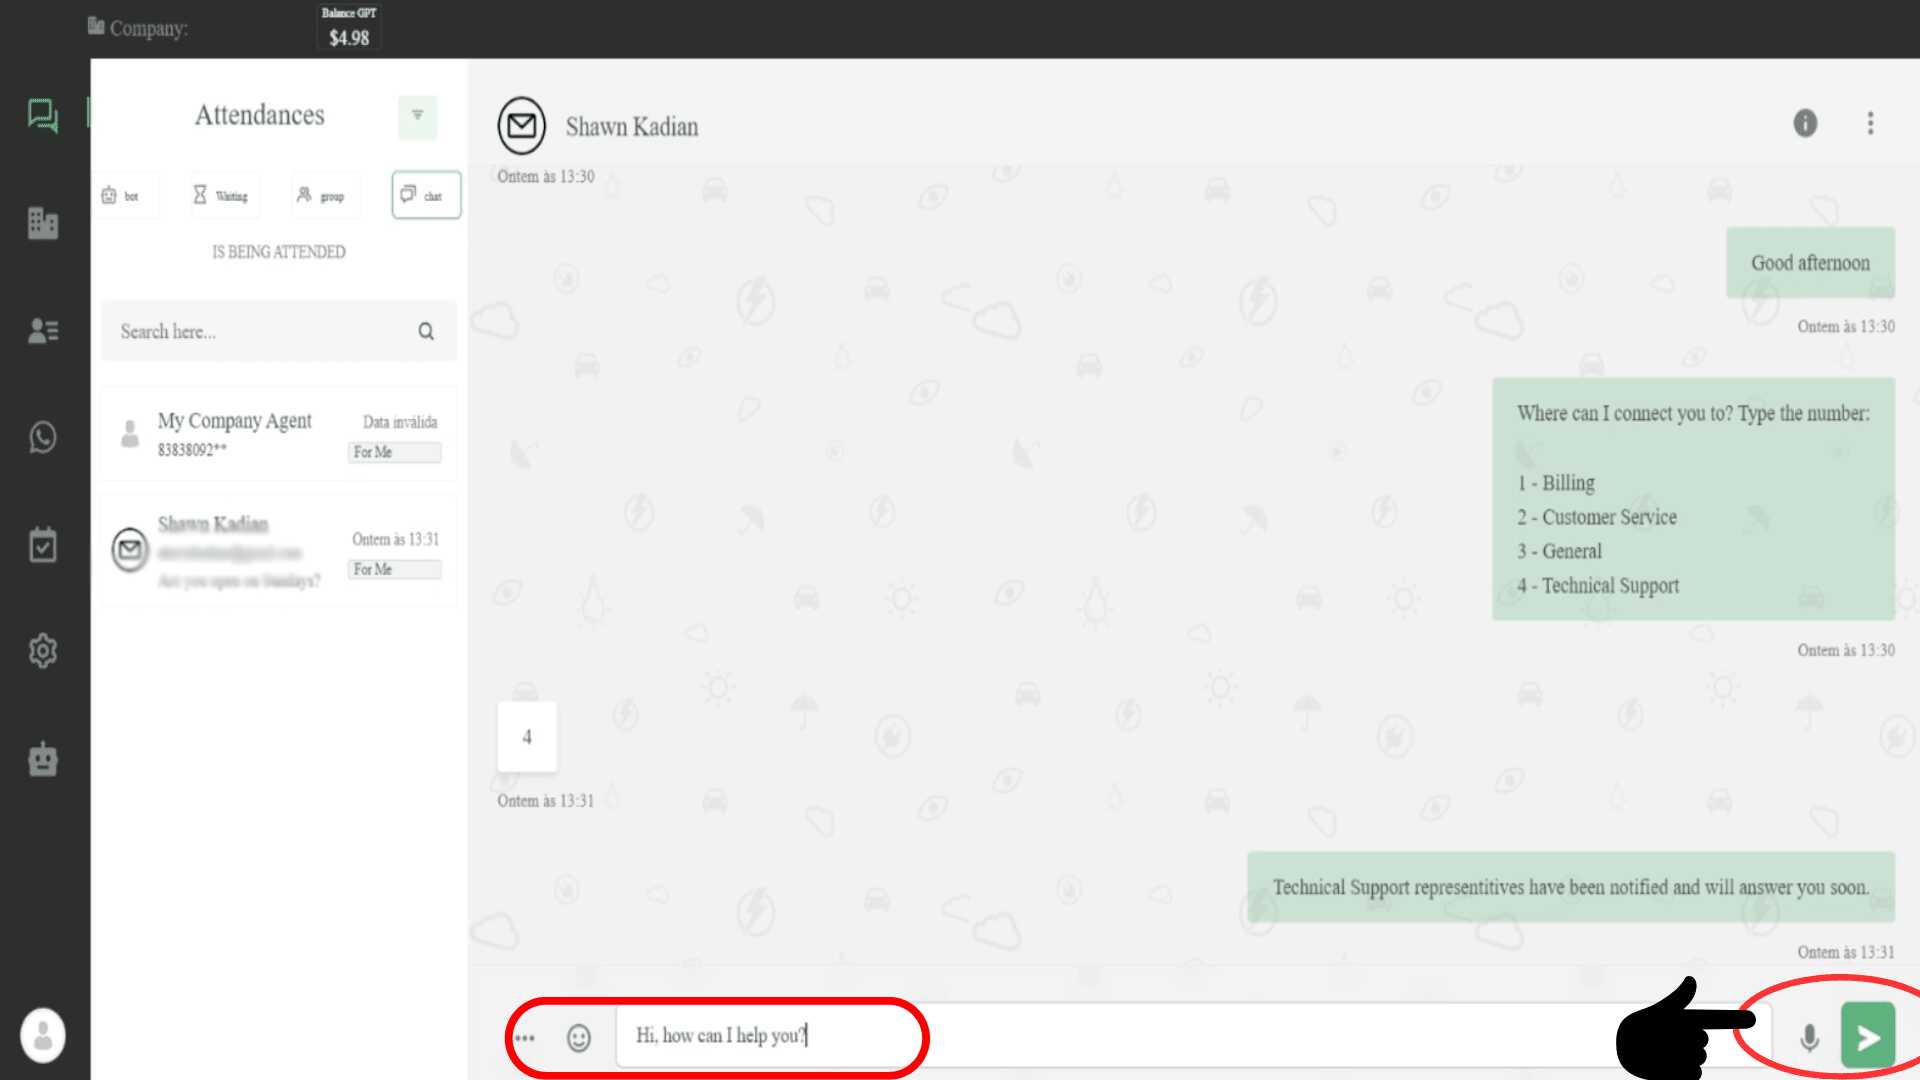
Step 3: Receiving and Managing Customer Messages
Once you’ve accepted the role of an attendant, you will start receiving messages from customers who want to speak to a human representative. These new chats will appear on your “Waiting List”, as shown in the image below.
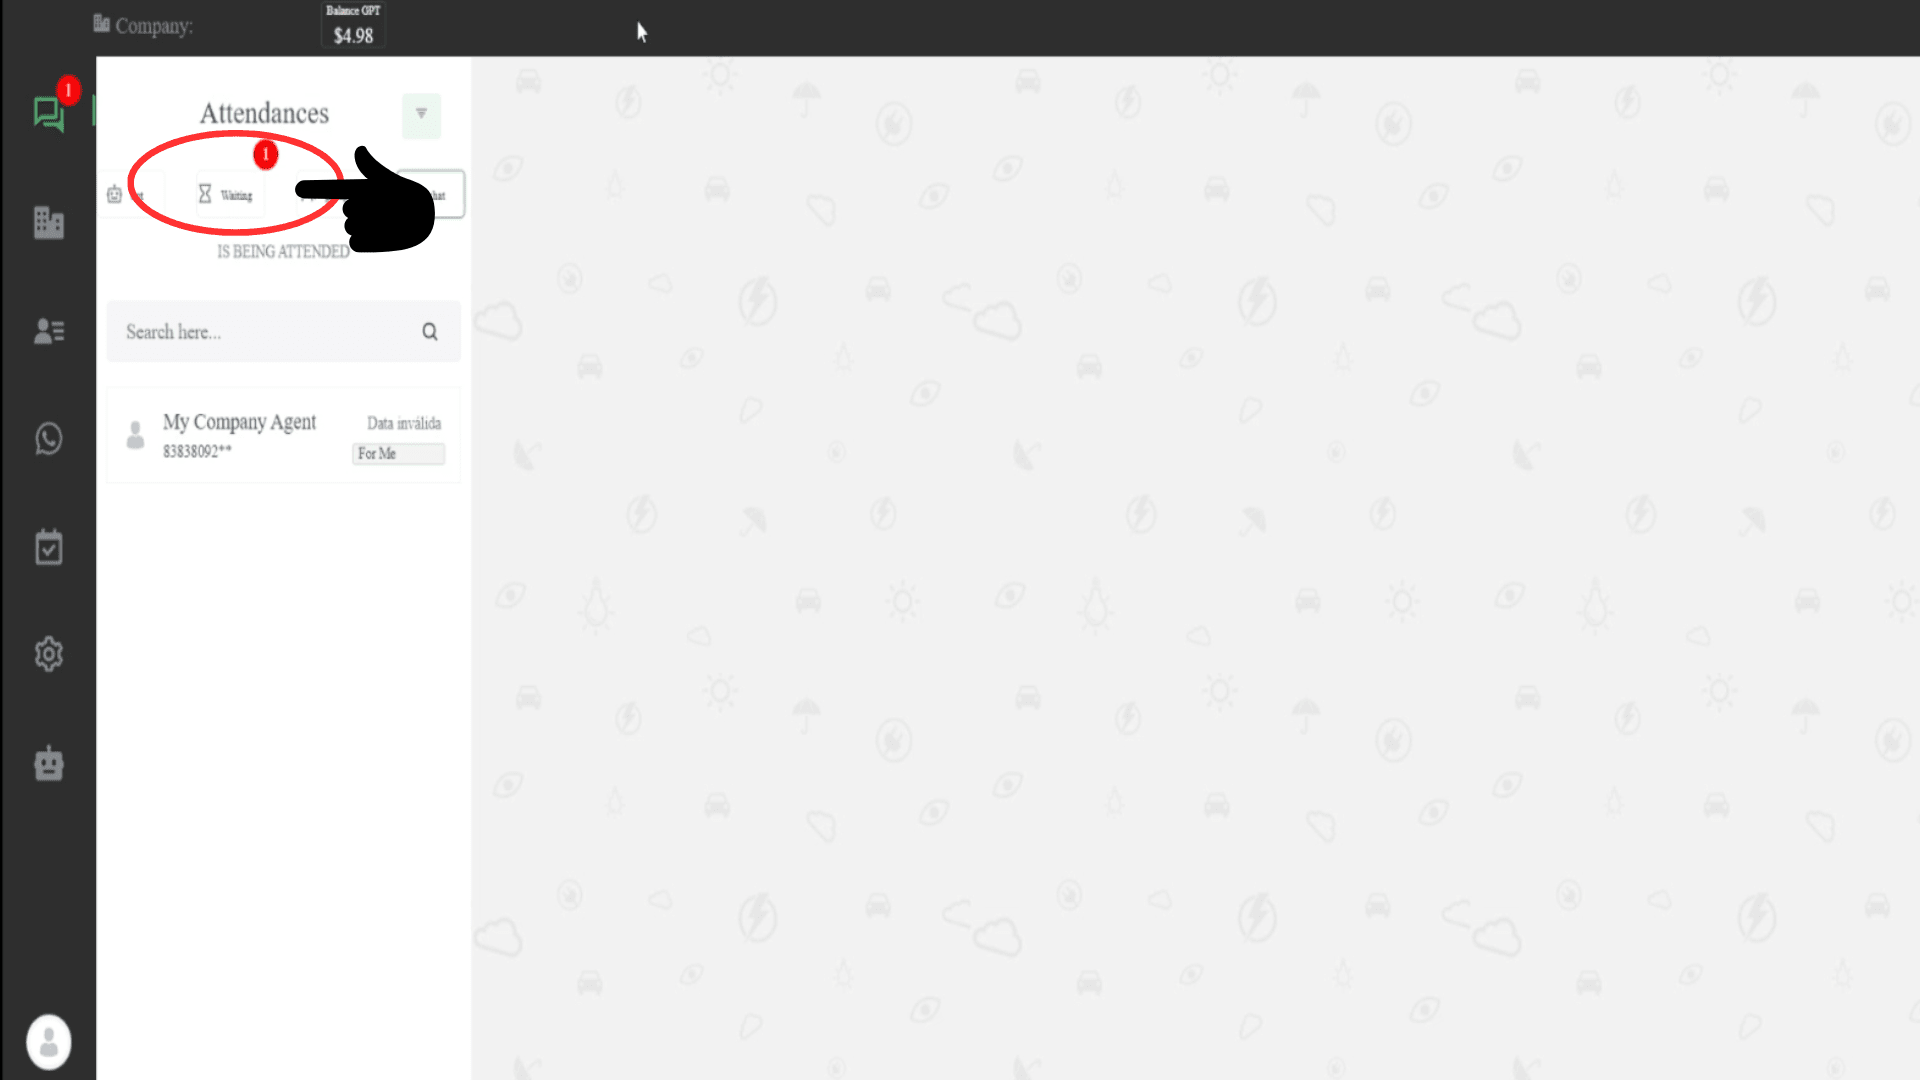
To start interacting with a customer, click on the “Waiting” option on the Chat page. This will show you the list of customers waiting to chat with you.
Step 4: Initiating a Conversation with the Customer
To begin the conversation, click on the customer’s name from the chat list. This will open their chat window, where you’ll find the “Start” option above the chat, as shown in the image below.
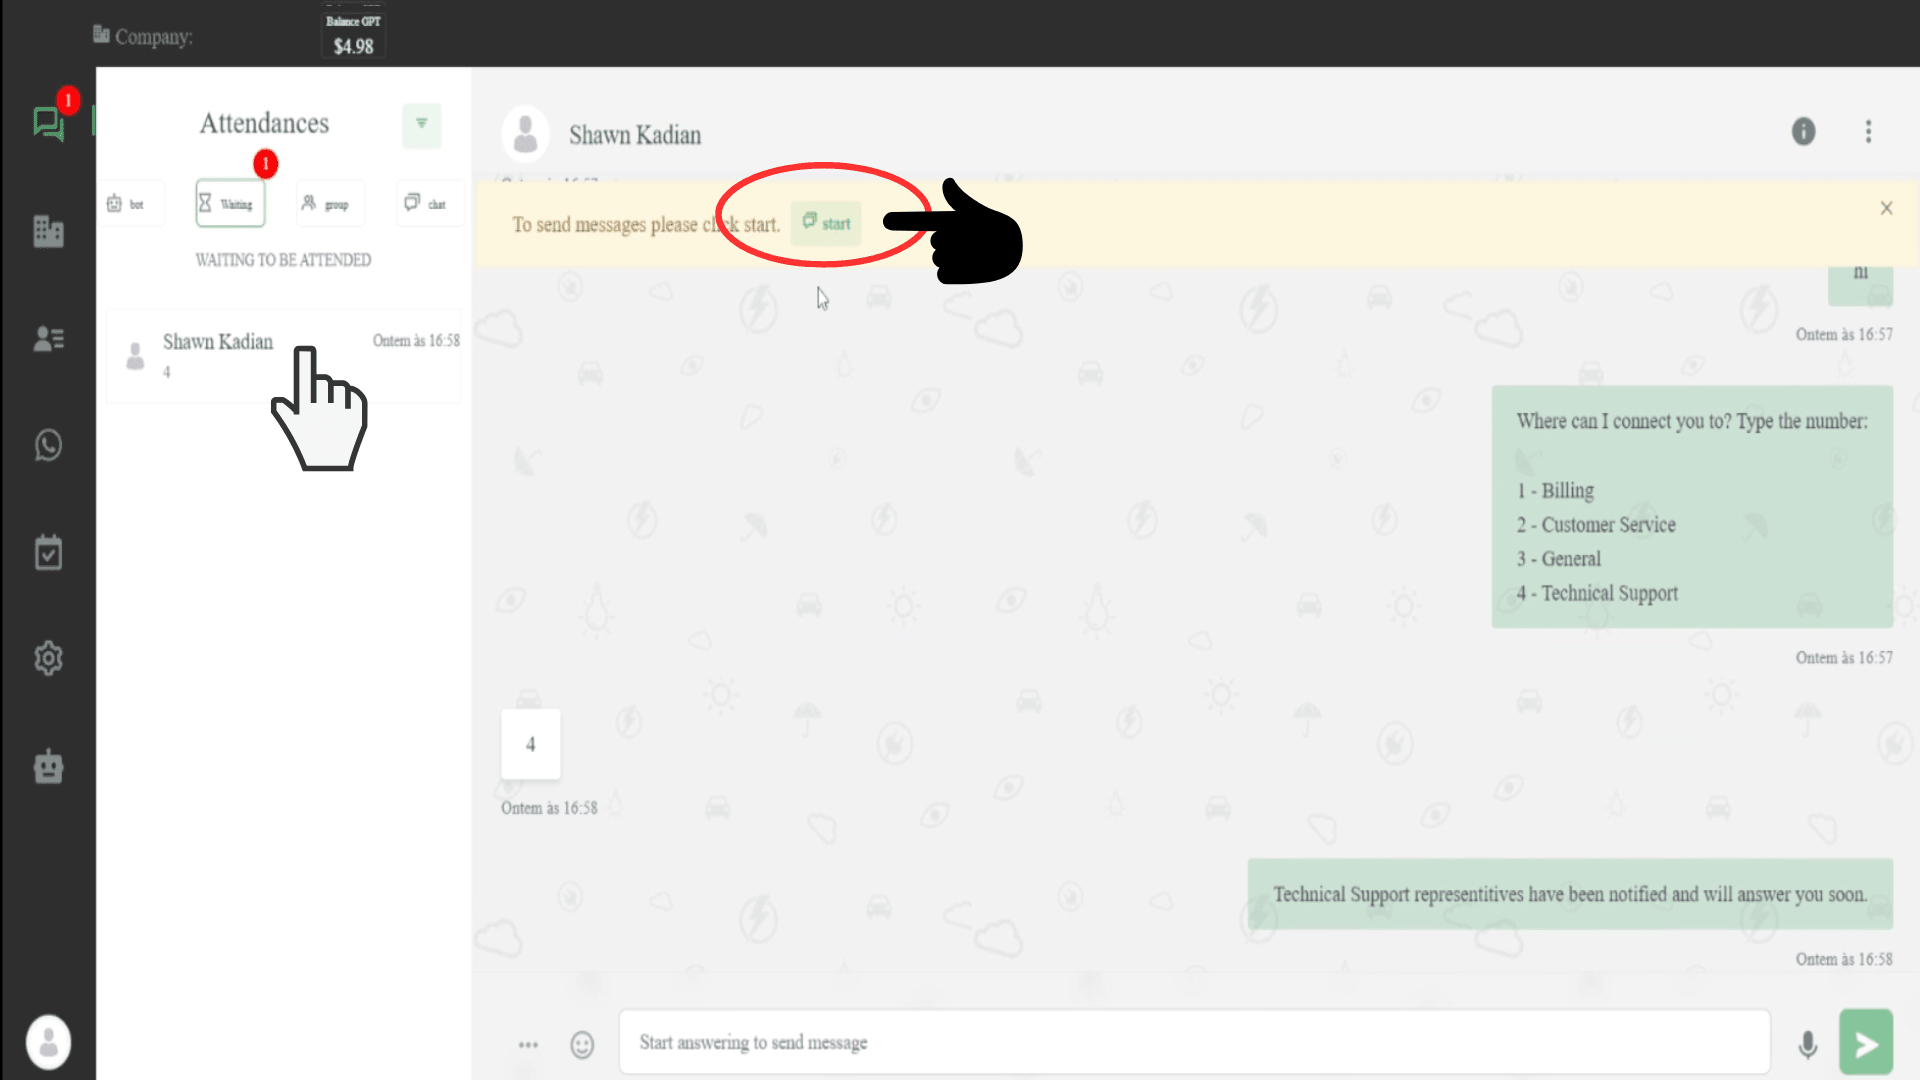
Clicking the “Start” button allows you to accept the customer’s chat request.
Step 5: Assisting Customers with Their Queries
Once you’ve clicked “Start”, you’re all set to communicate with the customer.
You can now send them messages, listen to their concerns, and provide the necessary assistance to resolve their queries.
To create an account, go to: https://www.wachatbot.ai/auth-register