
While chatbots are efficient, sometimes customers need to connect with a real person. Wachat Bot’s attendant system allows you to provide just that – a human touch. In this blog post, we will guide you through the steps to set up the attendant system in Wachat Bot.
Step 1: Navigating to the Business Settings Page
First, click on the “Settings” icon from the side menu on Wachat Bot.
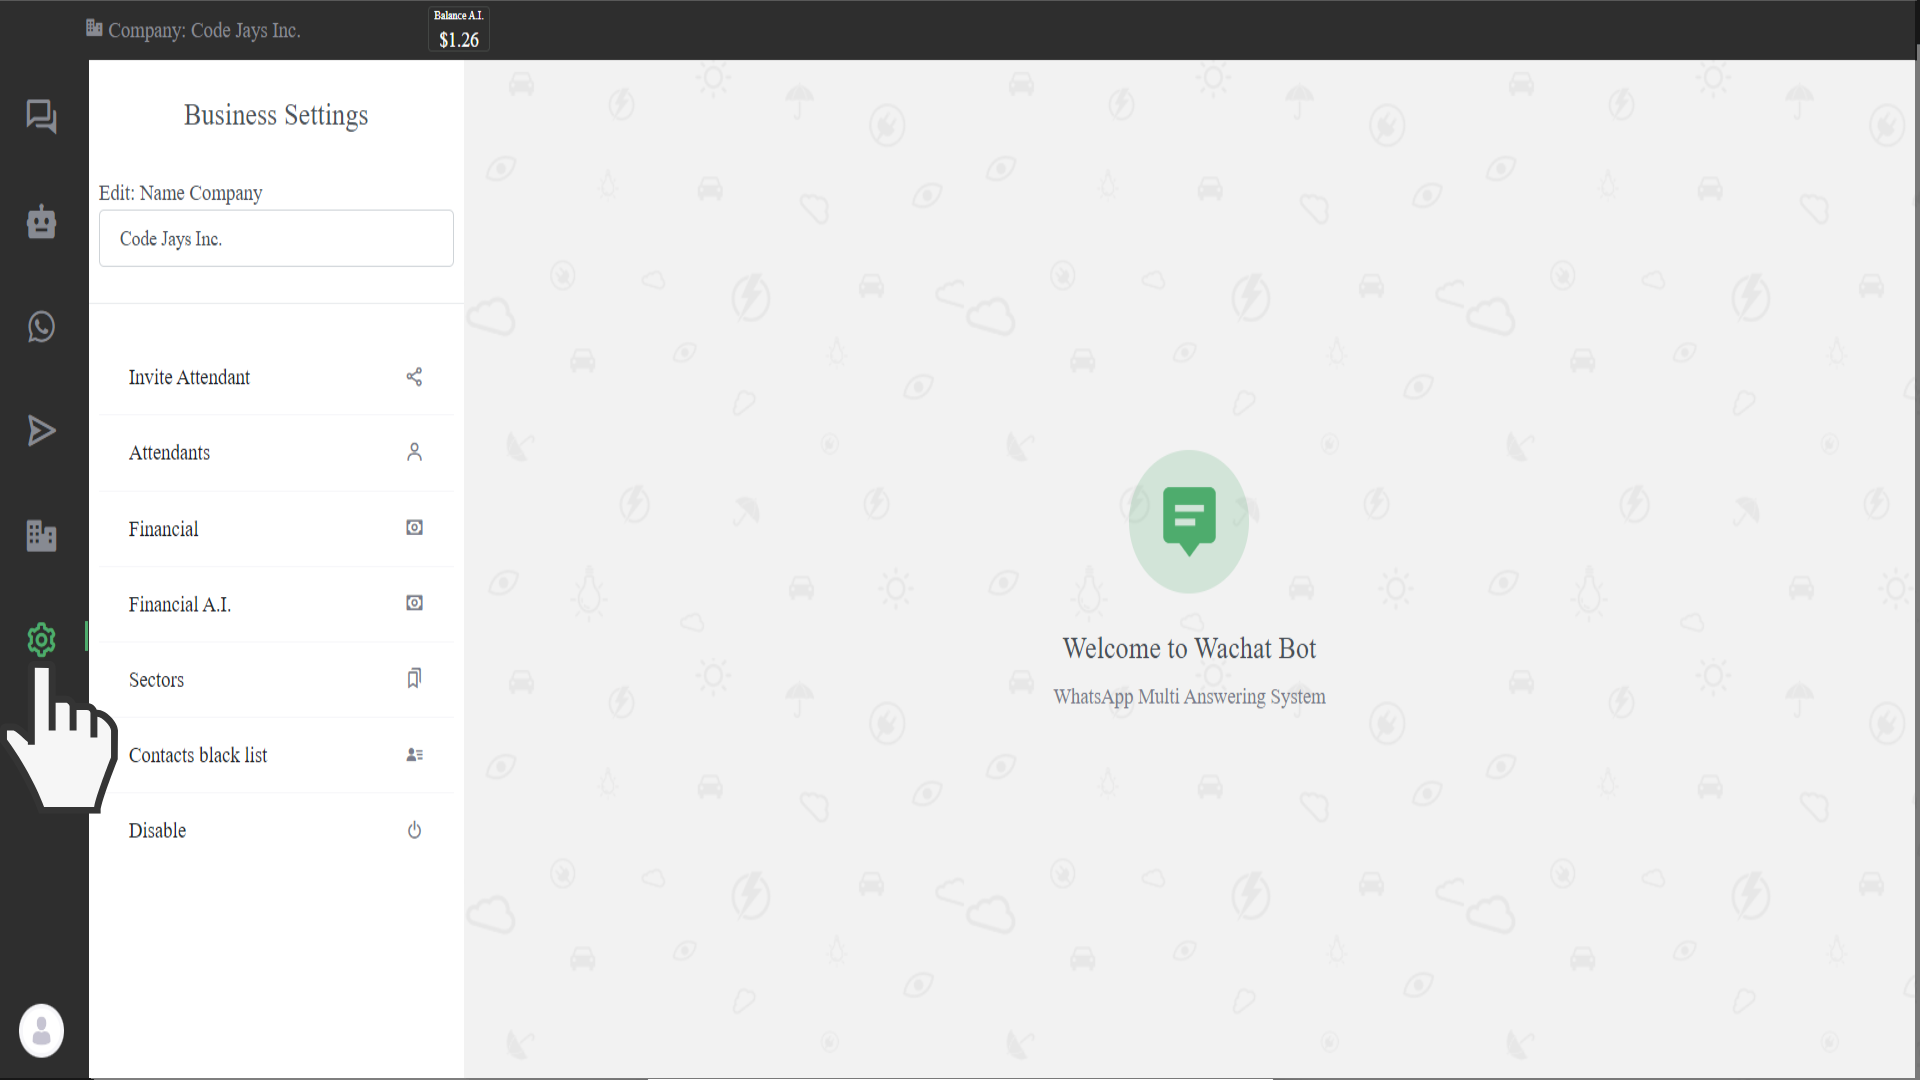
This will open the Business Settings page, where you can customize various aspects of your business, including managing Attendants, Sectors, Blocked Contacts, and more.
Step 2: Exploring the Sectors Option
On the Business Settings page, click on the “Sectors” option.
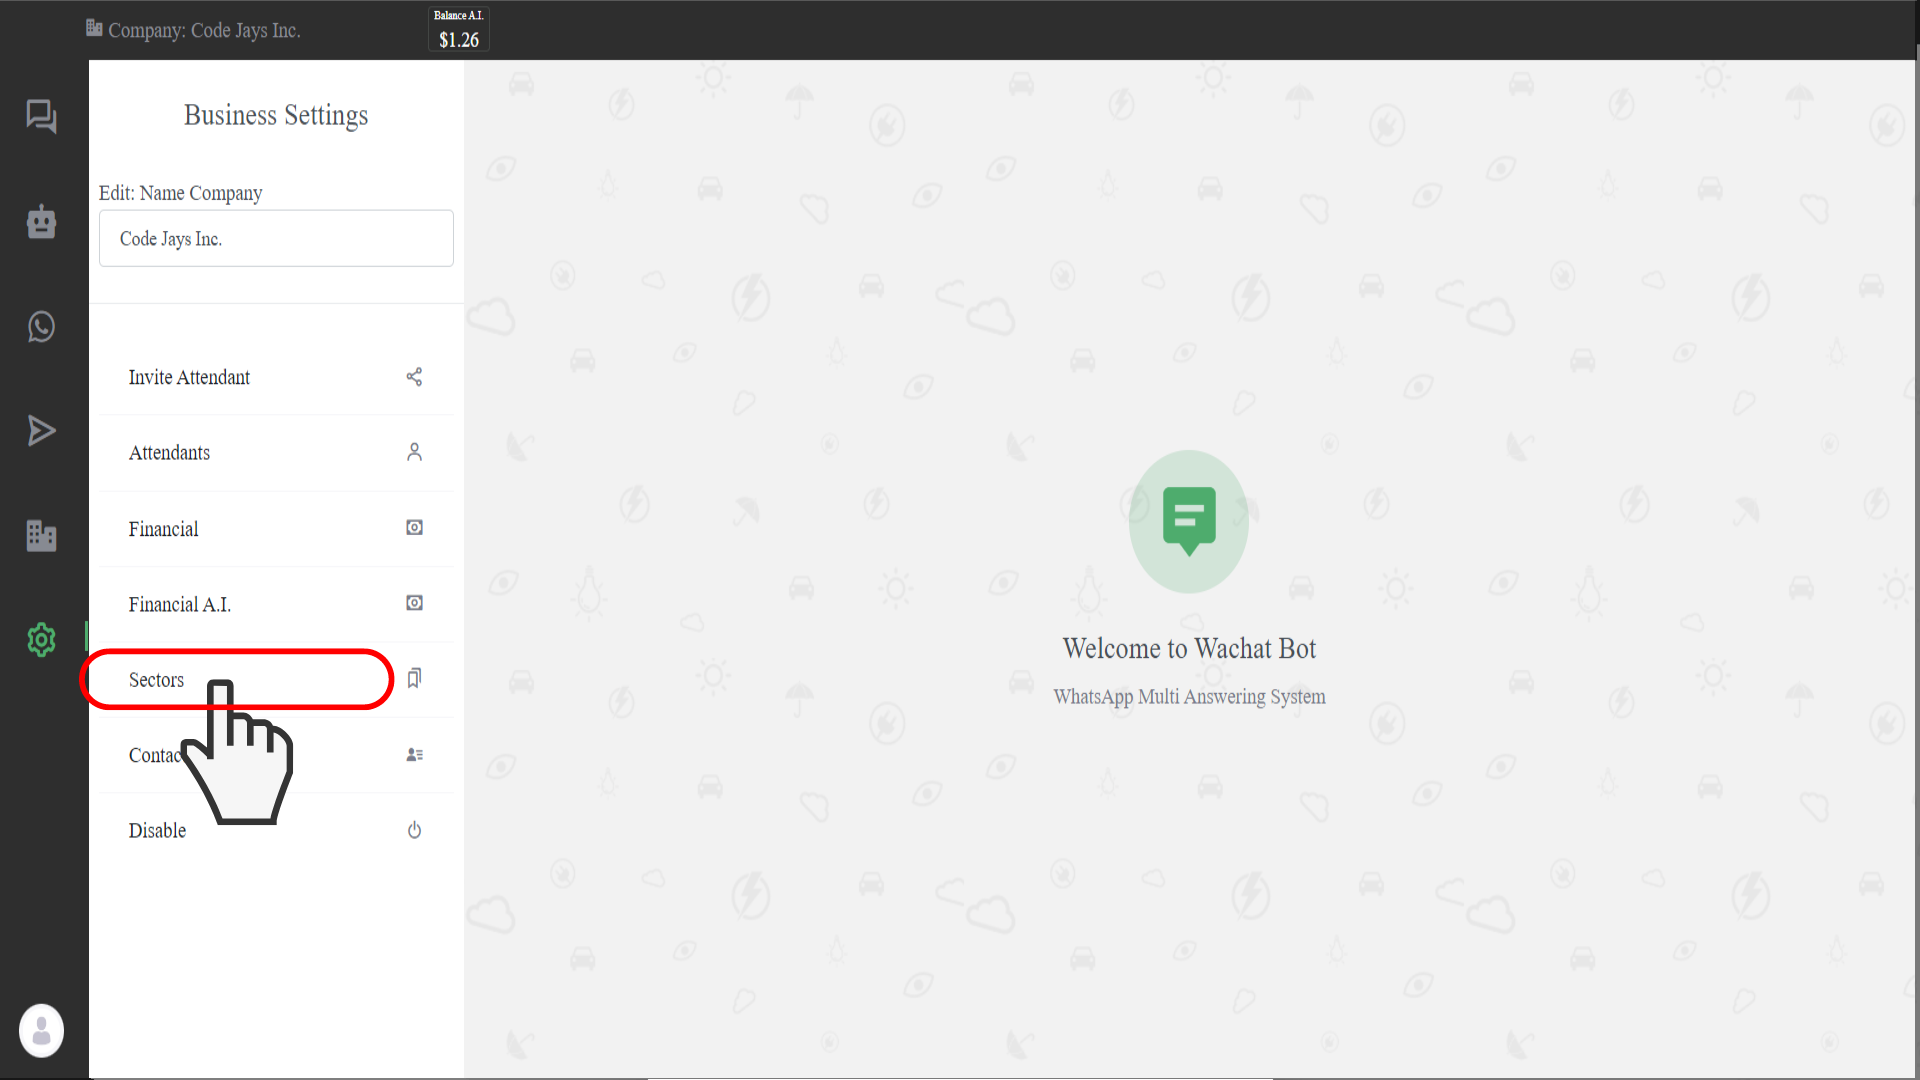
Sectors allow you to categorize attendants based on their specific areas of expertise, such as Technical Support, Sales, and so on. This ensures customers are directed to the right people for their queries.
Step 3: Creating a New Sector
To establish a new Sector, find and click on the “+” icon located at the top left corner of the Sectors page.
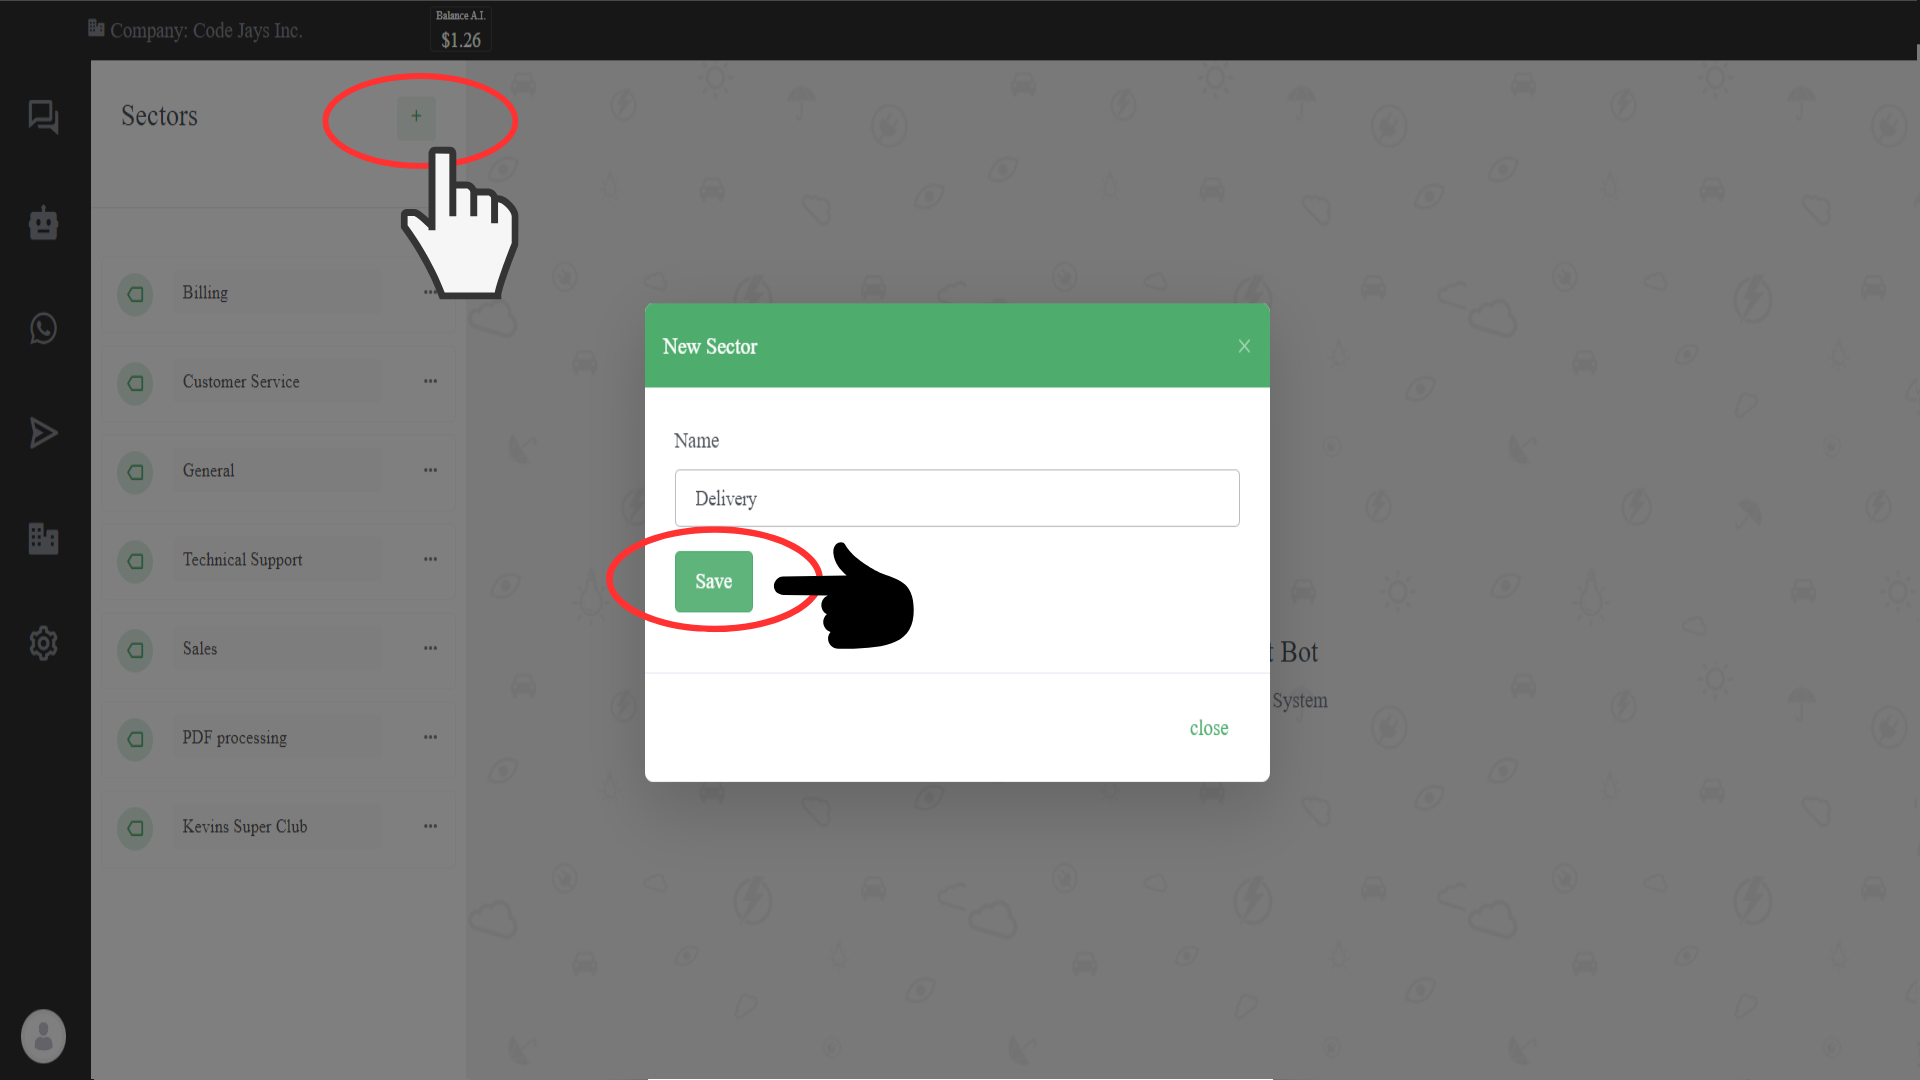
A pop-up will appear, prompting you to name your sector. Once you’ve decided on a name, click “Save”. You can repeat this process to create multiple sectors within your business, helping streamline your support structure.
Step 4: Inviting Attendants to Your Business
Once you’ve created appropriate sectors, return to the main Business Setting page and click on the “Invite Attendant” option.
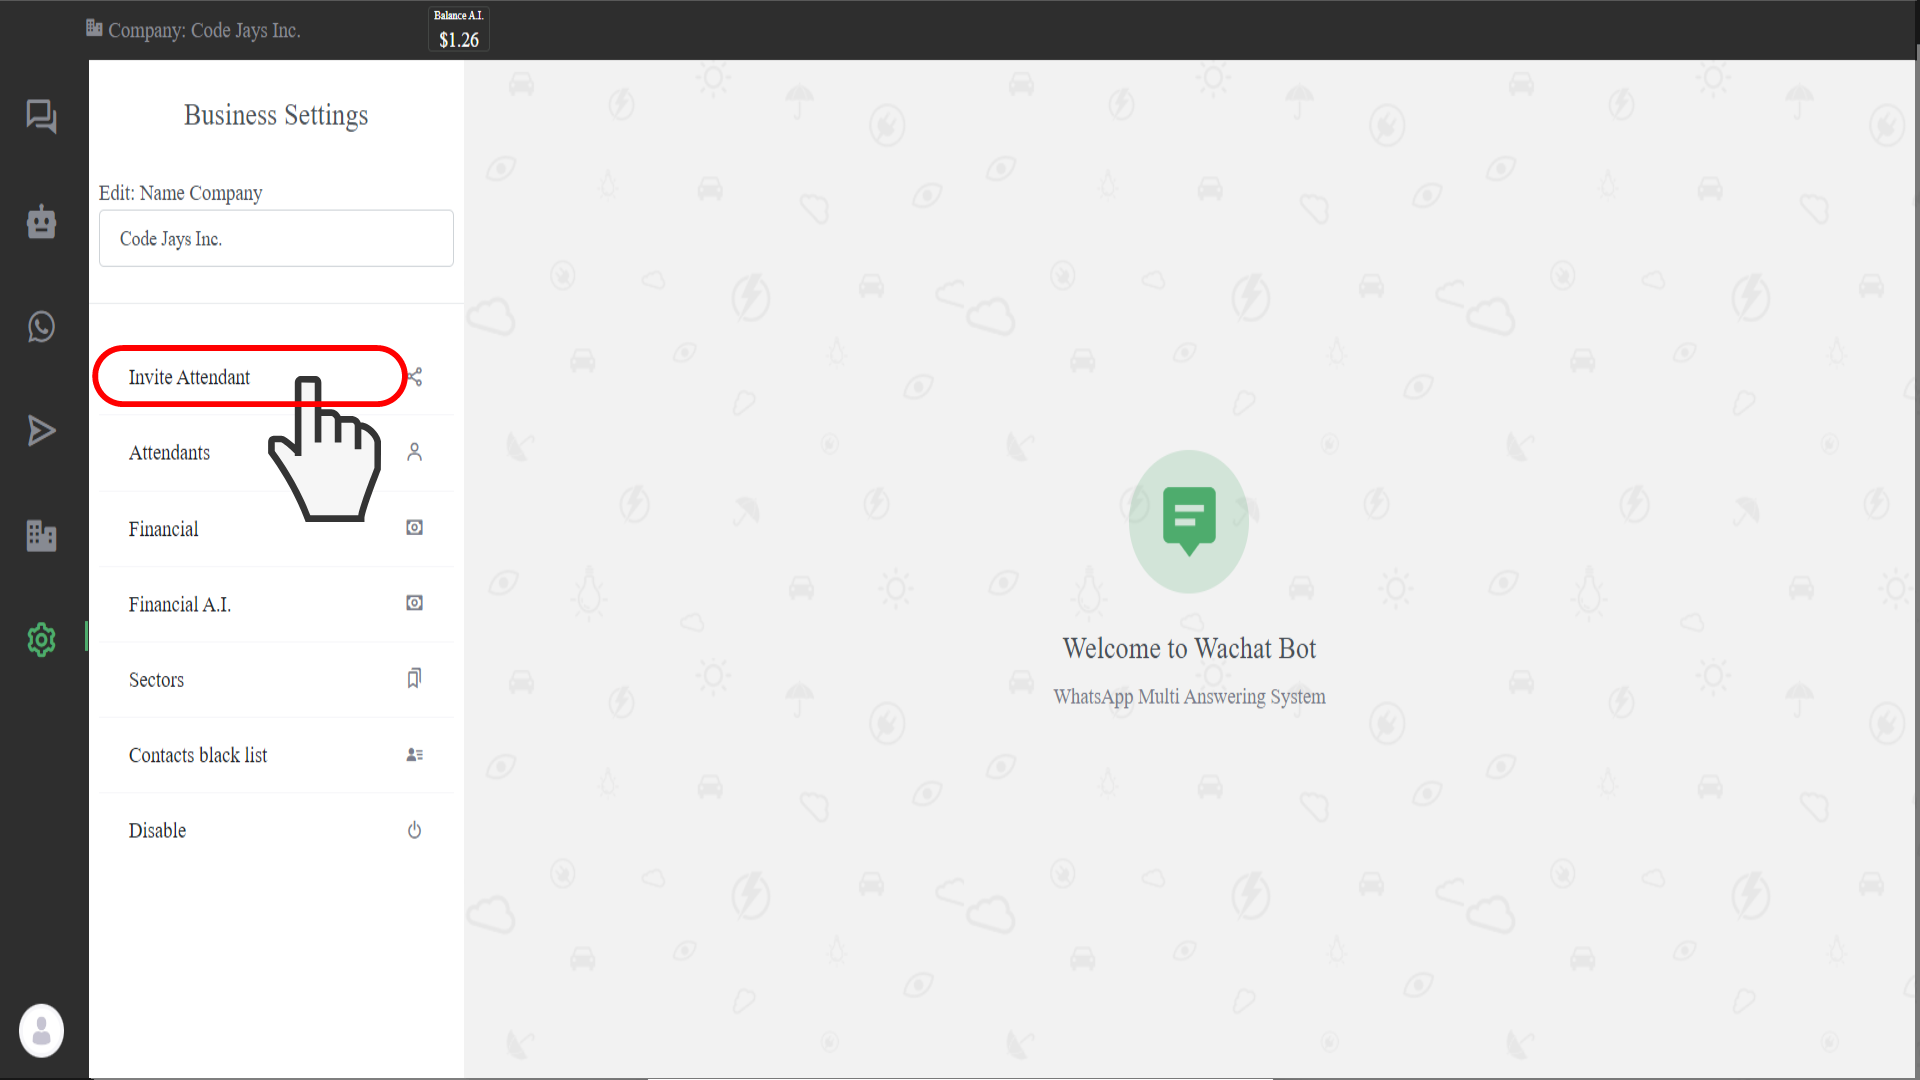
This feature enables you to invite other users in the Wachat system to join your business and provide the much-needed human touch.
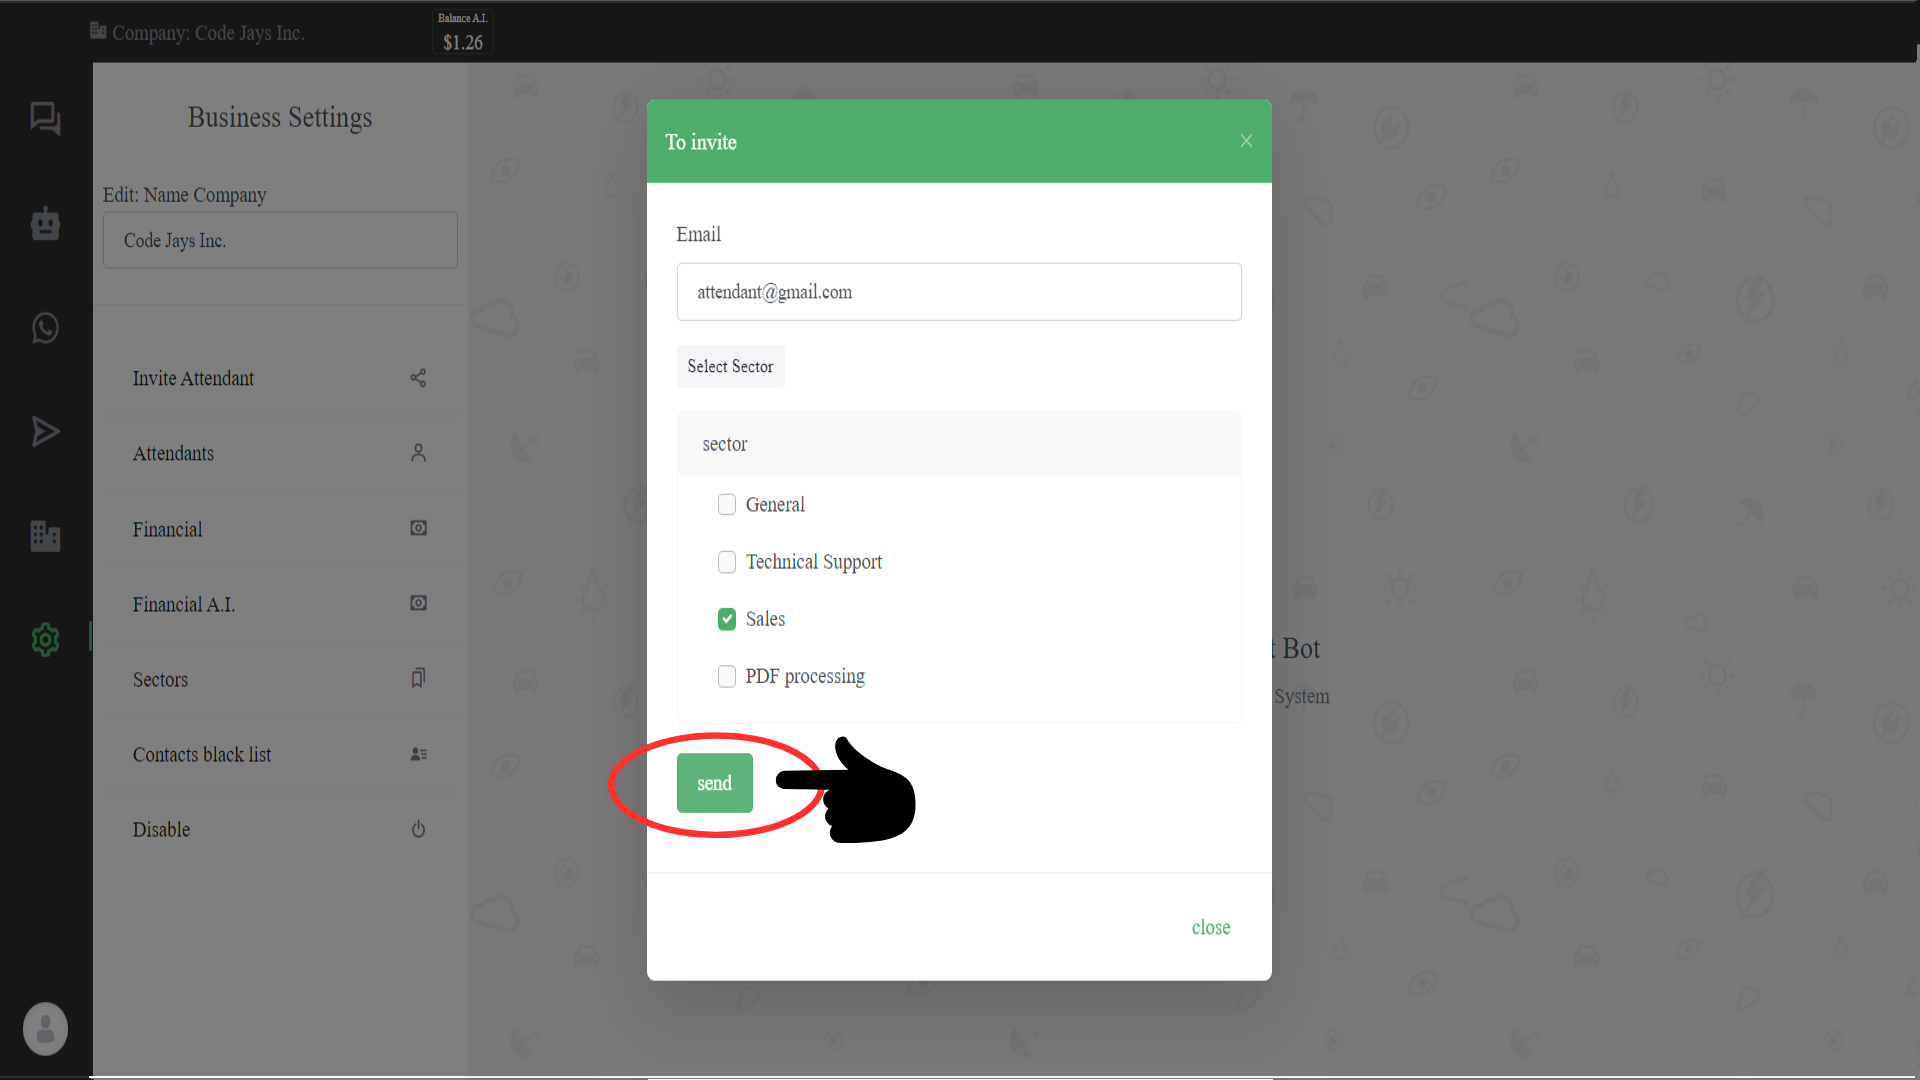
Step 5: Completing the Invitation Process
Upon clicking the “Invite Attendant” option, a form will pop up. This form will ask you to invite another Wachat user by entering their email address. Fill in the email of the person you want to be an attendant, and assign them to a sector by clicking on “Select Sector”. From the dropdown list, choose the sector that aligns with the attendant’s expertise. Click on “Send” when done.

The account with the E-Mail entered will receive an invite from you to be an attendant. Once they accept the invitation, they will be part of your team and can start interacting with your customers when required.
What’s Next?
With attendants and sectors in place, the next step is to efficiently manage and respond to customer chats using the attendant system. This will ensure that your customers have a seamless experience, whether they’re interacting with your bot or a human representative.
To create an account, go to: https://www.wachatbot.ai/auth-register
[…] human touch that makes a world of difference in customer service. Once you have successfully set up the attendant system, it’s time to learn how to use it effectively. In this blog post, we will take you through […]
[…] there comes a point when the query can only be solved by a human. That is why WaChatbot contains an attendant system. To send a customer to an attendant. we have included a #Human instruction in the text above. You […]